Creating a replication pipeline
Creating a replication pipeline
Create a replication pipeline to save your transfer configuration and run it manually, on a schedule, or continuously.
Before you start
Add the source and destination storage accounts on the Data tab. Their credentials must allow the operations you intend to perform: listing and reading source objects, writing destination objects, and deleting objects if your settings require deletion.
For continuous replication, also check the requirements in Continuous replication pipelines.
Create a pipeline
Open the Pipelines tab.
Click New pipeline.
Enter a descriptive name, such as
Hourly media replica.
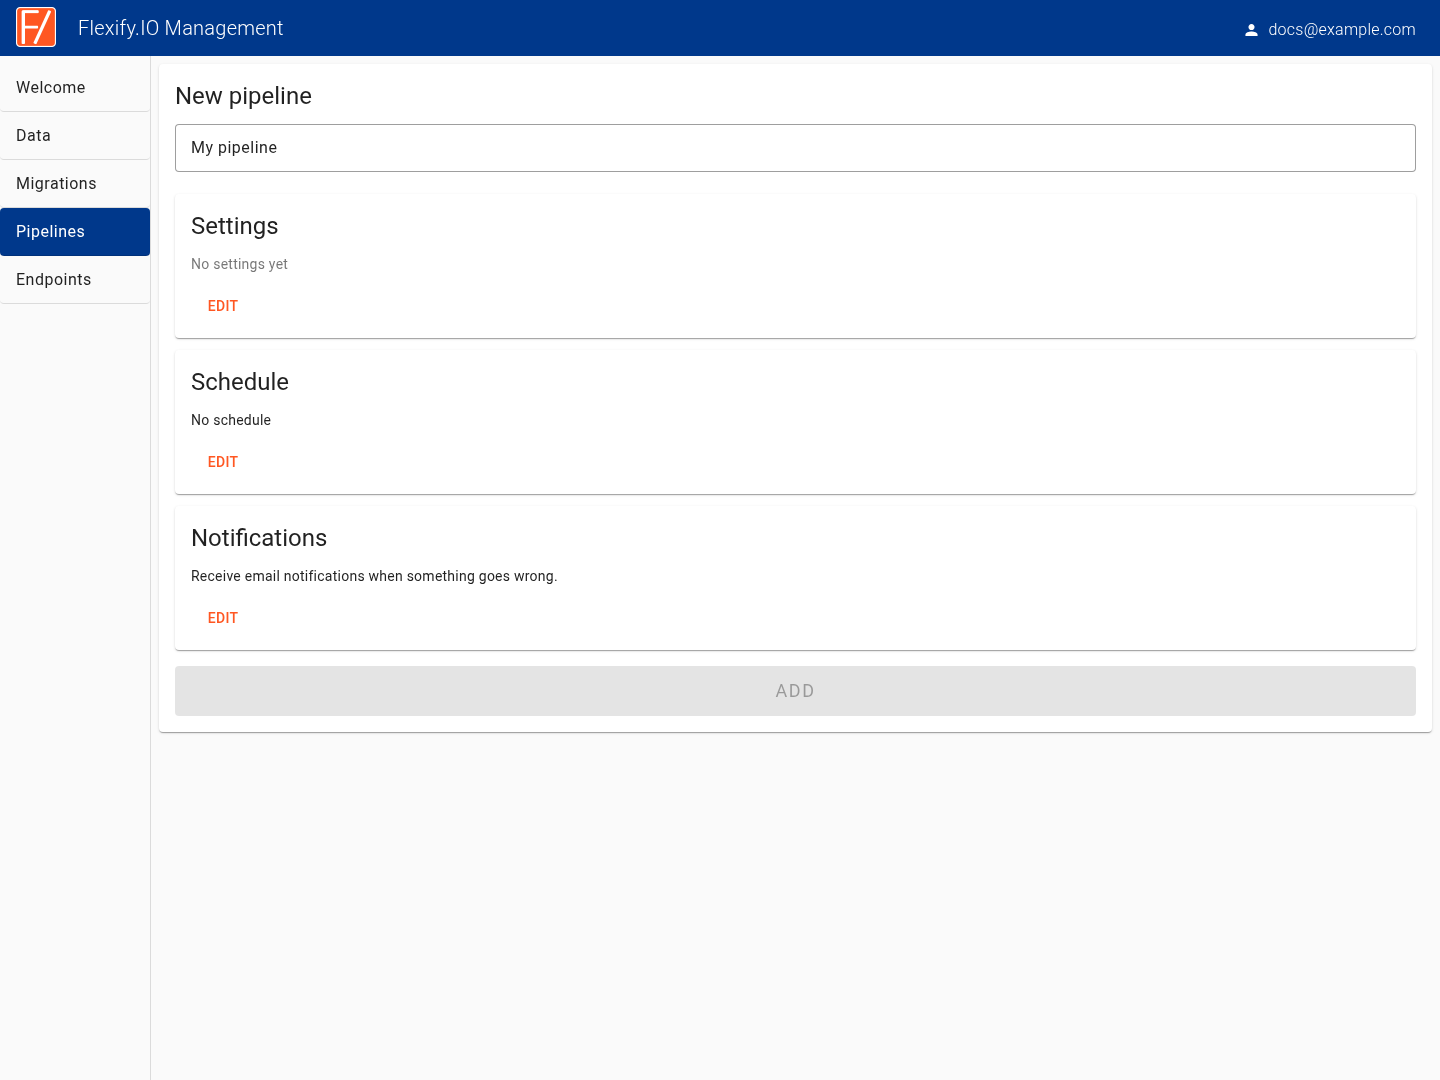
The page has three configuration cards. Each has an Edit button.
Settings
Click Edit in the Settings card.
In From, select a source storage account and bucket or container.
In To, select a destination storage account and bucket or container.
Enter source or destination prefixes if you want to transfer only part of a bucket or change the destination path.
Click Add mapping if you need additional source–destination pairs.
Open Advanced settings to configure copy or move mode, filtering, deletion behaviour, conflict resolution, and performance settings.
Click OK to validate the configuration and return to the new pipeline page.
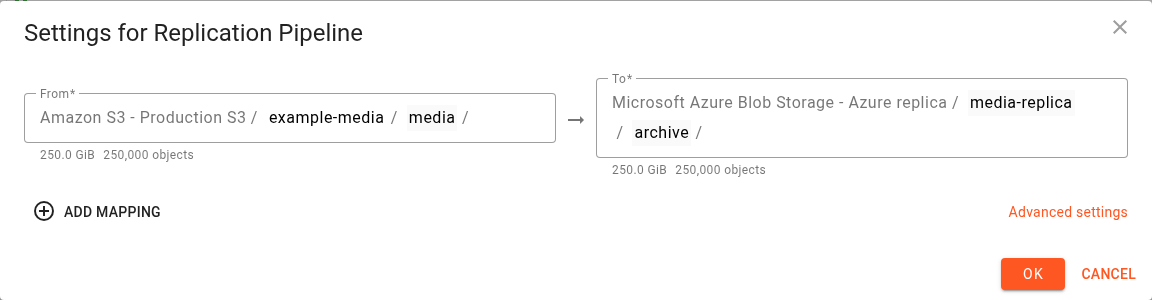
Review the direction and prefixes of every mapping before continuing. See Pipeline mappings and transfer settings for examples and the available options.
Schedule
Click Edit in the Schedule card.
Choose Hourly, Daily, Weekly, or Monthly, and select the times or days.
Choose No schedule if you want to start runs manually.
Click OK.
Check the time zone displayed in the schedule dialog. Scheduled times use the management server's time zone.
For a continuous pipeline, choose Continuous before configuring Settings. This allows the settings editor to apply the restrictions for continuous replication. See Continuous replication pipelines.
Notifications
Click Edit in the Notifications card.
Choose which events should generate an email.
Click OK.
If this card says notifications are disabled for your account, enable email notifications in your account settings first. See Pipeline email notifications.
Save the pipeline
Review the name, mappings, settings, schedule, and notification summary, then click Add at the bottom of the page.
The pipeline appears on the Pipelines tab. A pipeline with No schedule waits for you to click Run now. A periodic pipeline runs according to its schedule. A continuous pipeline begins setting up its notification configuration and processing service.
Saving Settings, Schedule, or Notifications on the new pipeline page prepares the configuration. The pipeline itself is created when you click Add.
Create a pipeline from an existing migration
You can reuse a migration's mappings and settings:
Open the Migrations tab and find the migration.
Click Schedule migration on its card.
Review the prefilled settings on the new pipeline page.
Choose a pipeline name, schedule, and notifications.
Click Add.
This action creates a pipeline from the migration configuration. If a migration already belongs to a pipeline, use the link to that pipeline to manage it.
If you cannot add a pipeline
A pipeline needs a non-empty name and valid transfer settings with at least one mapping. Review validation messages for missing storage locations, permissions, or incompatible settings.
If New pipeline is disabled on the Pipelines tab, your account may have reached its pipeline limit. Contact your administrator or Flexify.IO support to review the limit.