How to distribute data across multiple cloud providers with Flexify.IO
As cloud storage becomes a commodity, many teams find that their first storage provider is no longer the best fit for performance, features, price, or all three.
With Flexify.IO, you choose where each new gigabyte goes. You can have storage accounts with several providers, while your application sees all the data combined in a single bucket.

New objects your application writes go to the storage you choose and you can change that storage at any time, in a couple of clicks, without touching your application code or configuration.
Step 1. Add your current storage
Start with the storage where your data is today.
Open Flexify.IO Management at manage.flexify.io.
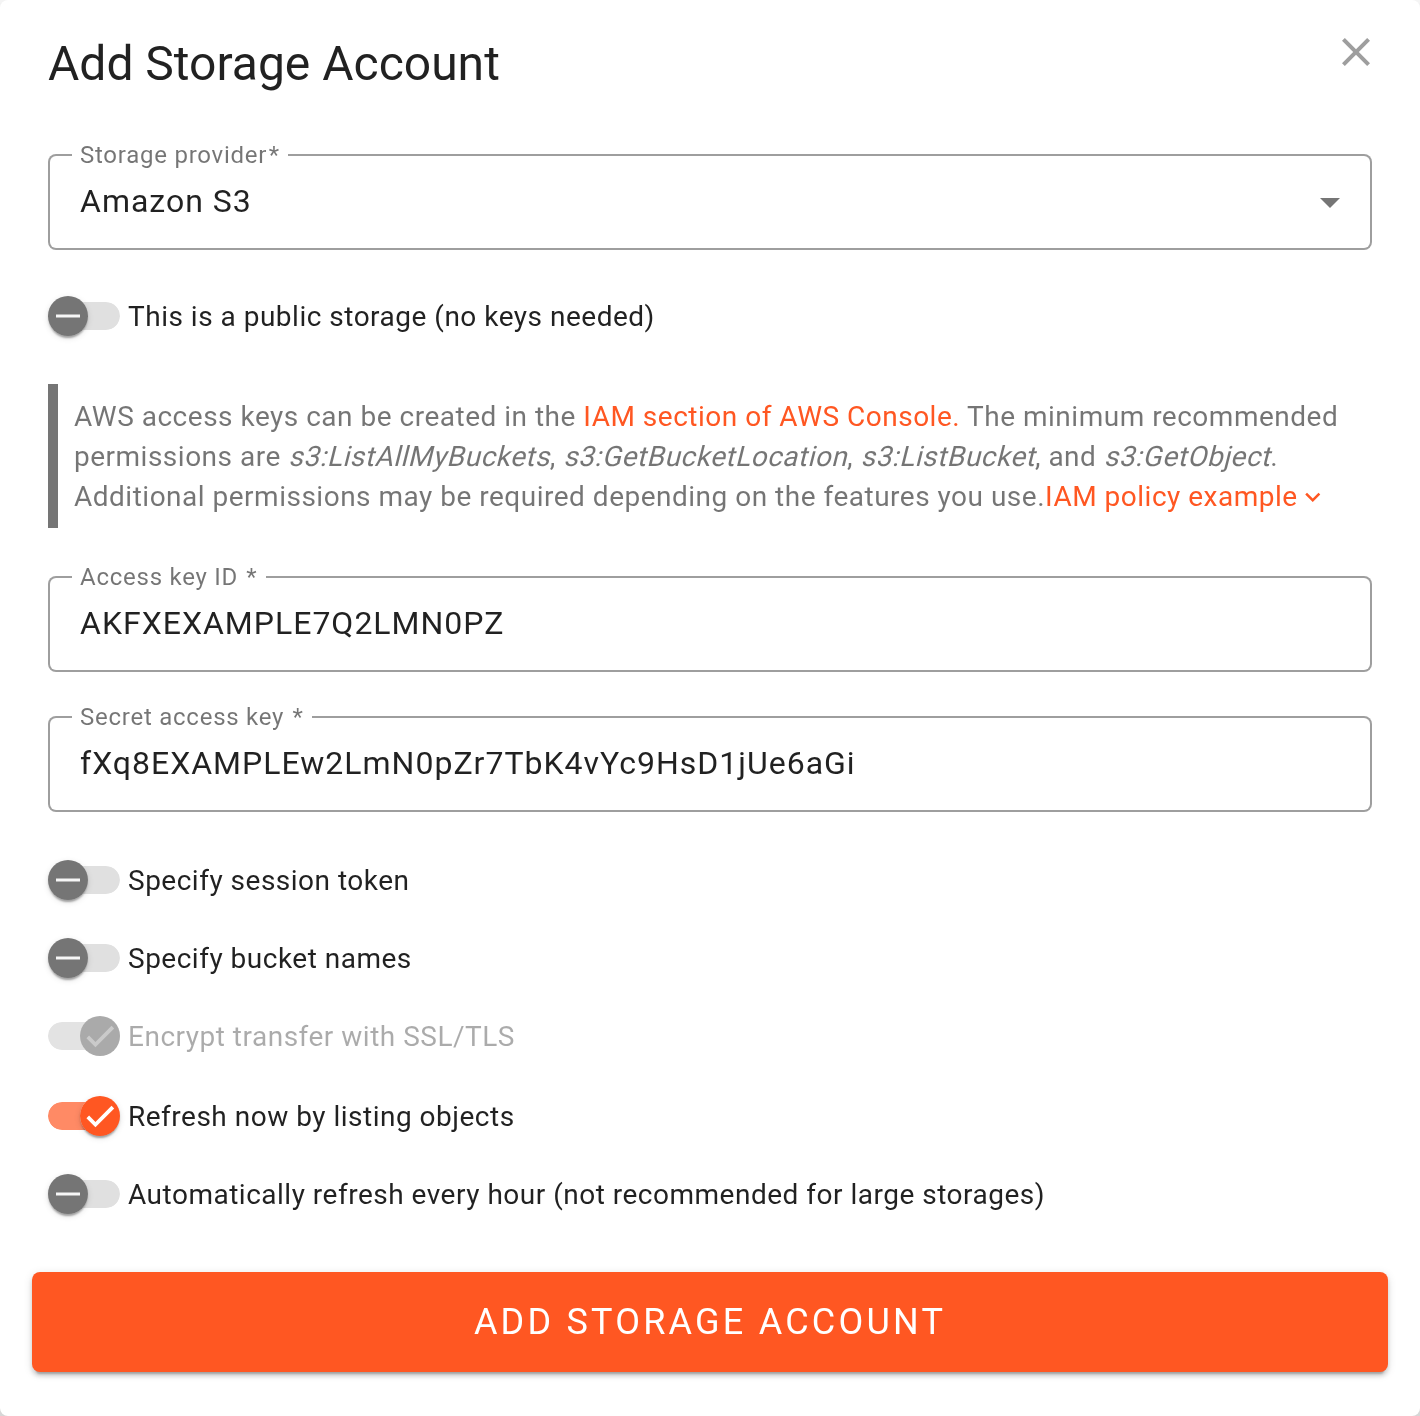
Open Data and click Add Storage Account.
Select the Storage provider (and Product, if shown), for example Amazon S3 or Microsoft Azure.
Enter the credentials:
Amazon S3:Access key ID and Secret access key, from the IAM section of the AWS Console.
Microsoft Azure:Storage Account Name and Key or SAS token, from the Azure Portal.
Click Add Storage Account. Flexify.IO checks the credentials and lists the buckets.
Step 2. Create an endpoint and route your application through it
Open Endpoints tab and click New Endpoint.
Click Attach in the storage bar, select the storage account you added, and click Attach.
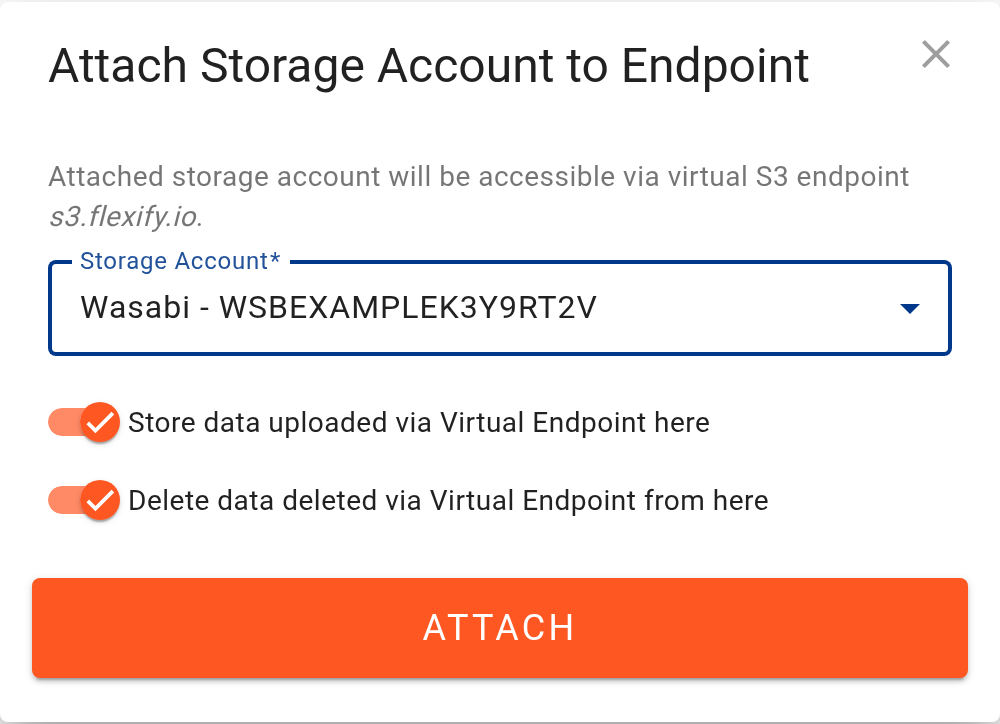
Configure your application to send requests to the address in Endpoint (S3) (for example
s3.flexify.io) and to use the endpoint's Access key ID and Secret access key. Both are in the endpoint card's Settings & Keys section. See Configuring S3 applications to use Flexify.IO.
The endpoint now proxies all requests to your storage, and translates S3 to Azure if needed.
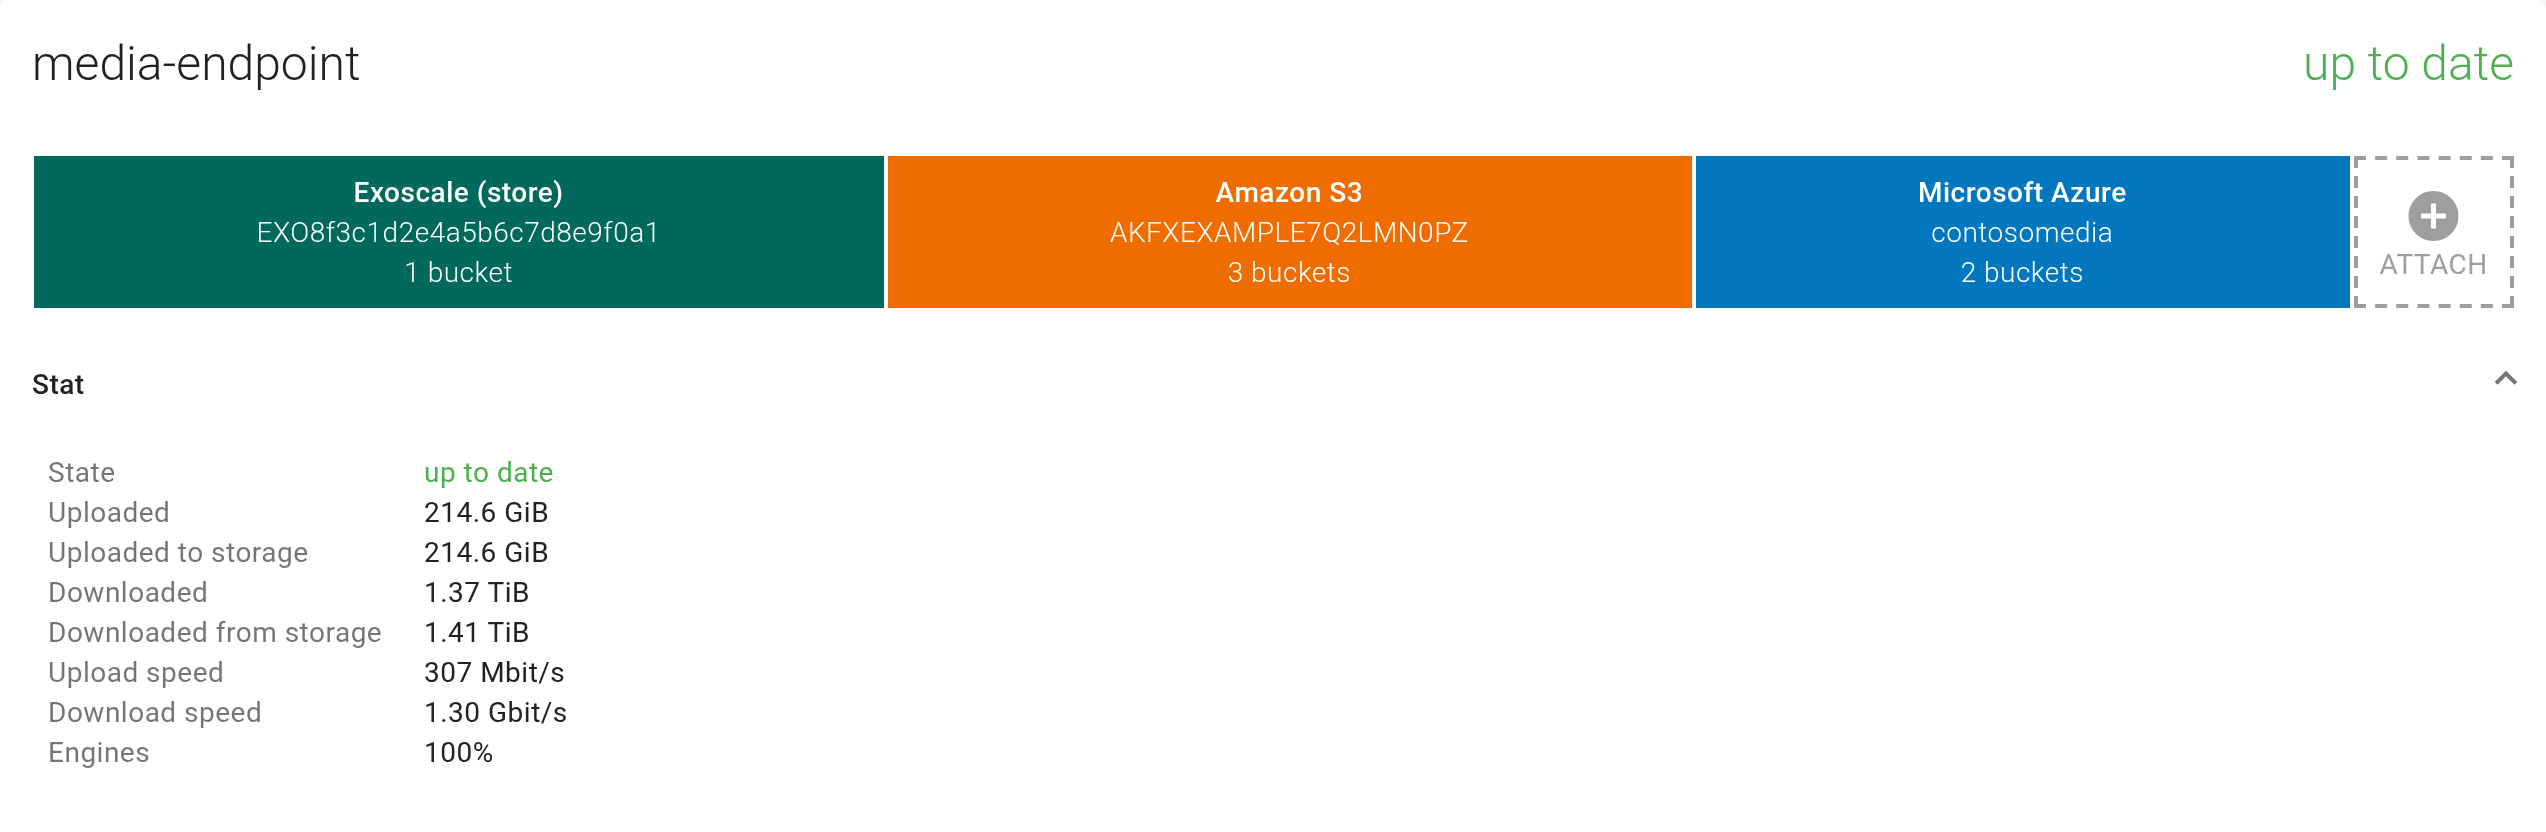
Once your application sends or receives data through Flexify.IO, the Stat section of the endpoint card shows traffic counters.
Step 3. Add more storages
On the Data tab, click Add Storage Account and add each additional storage. Add as many as is practical.
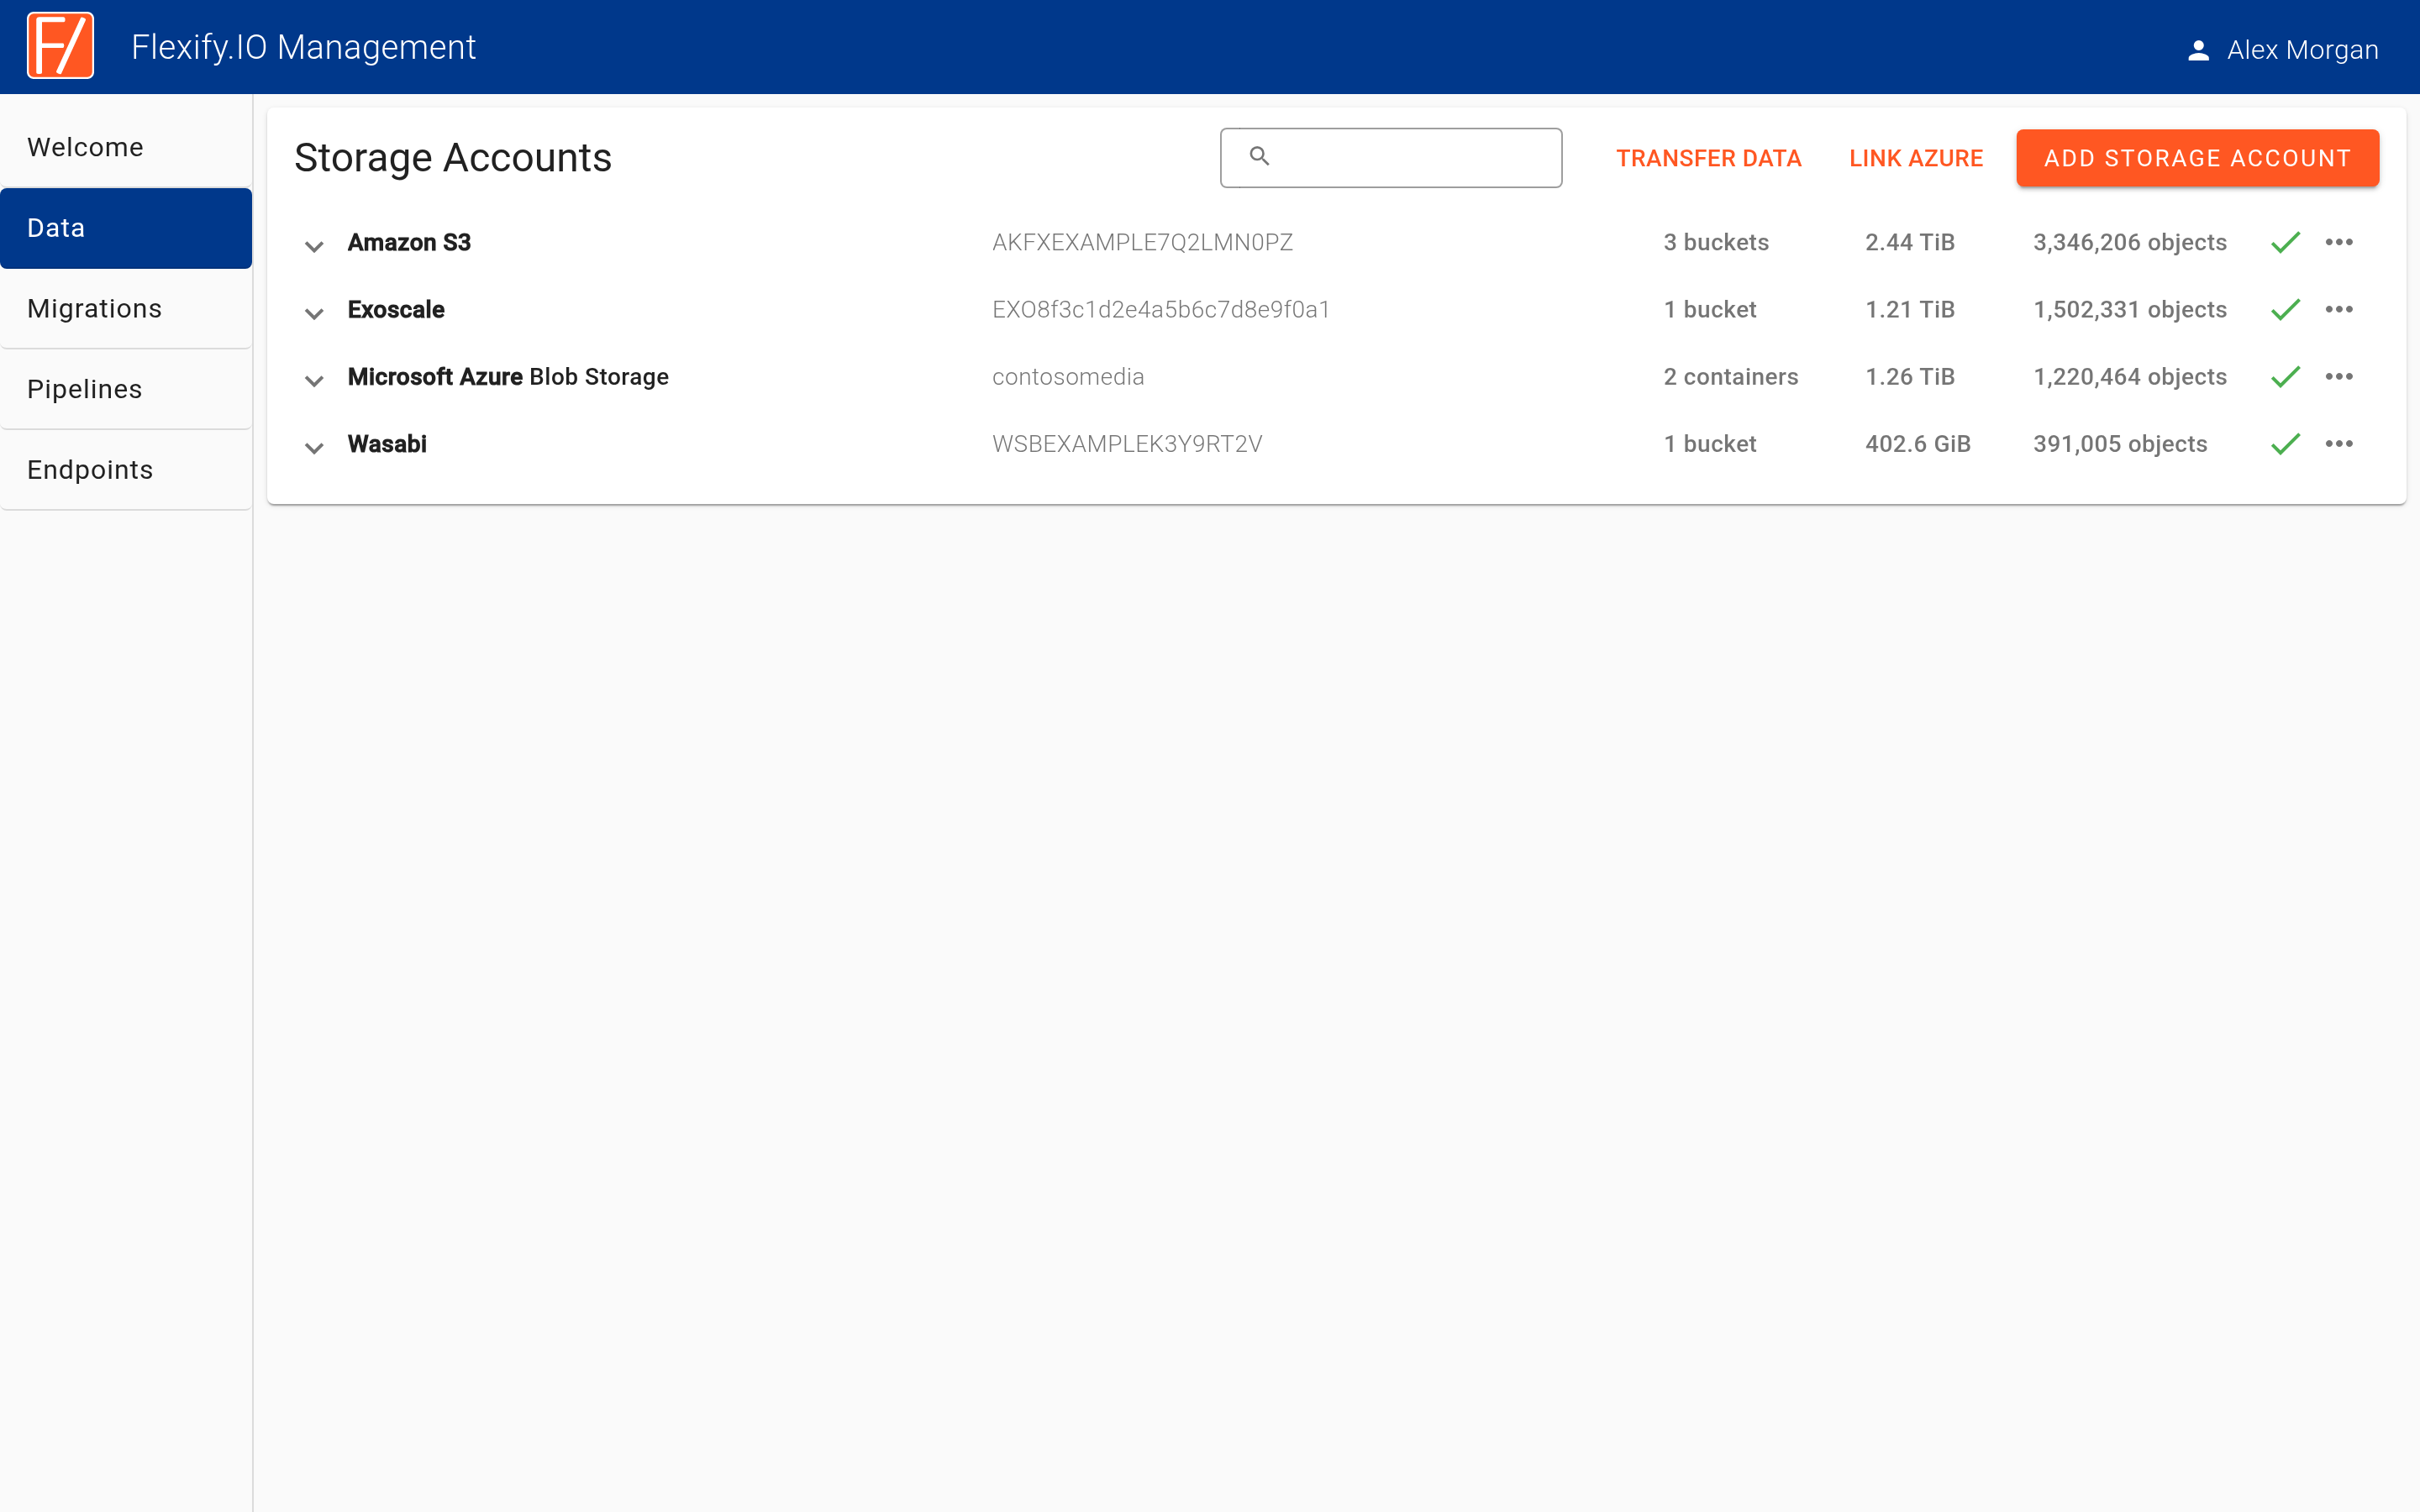
On the Endpoint tab, click Attach and attach each new storage account.
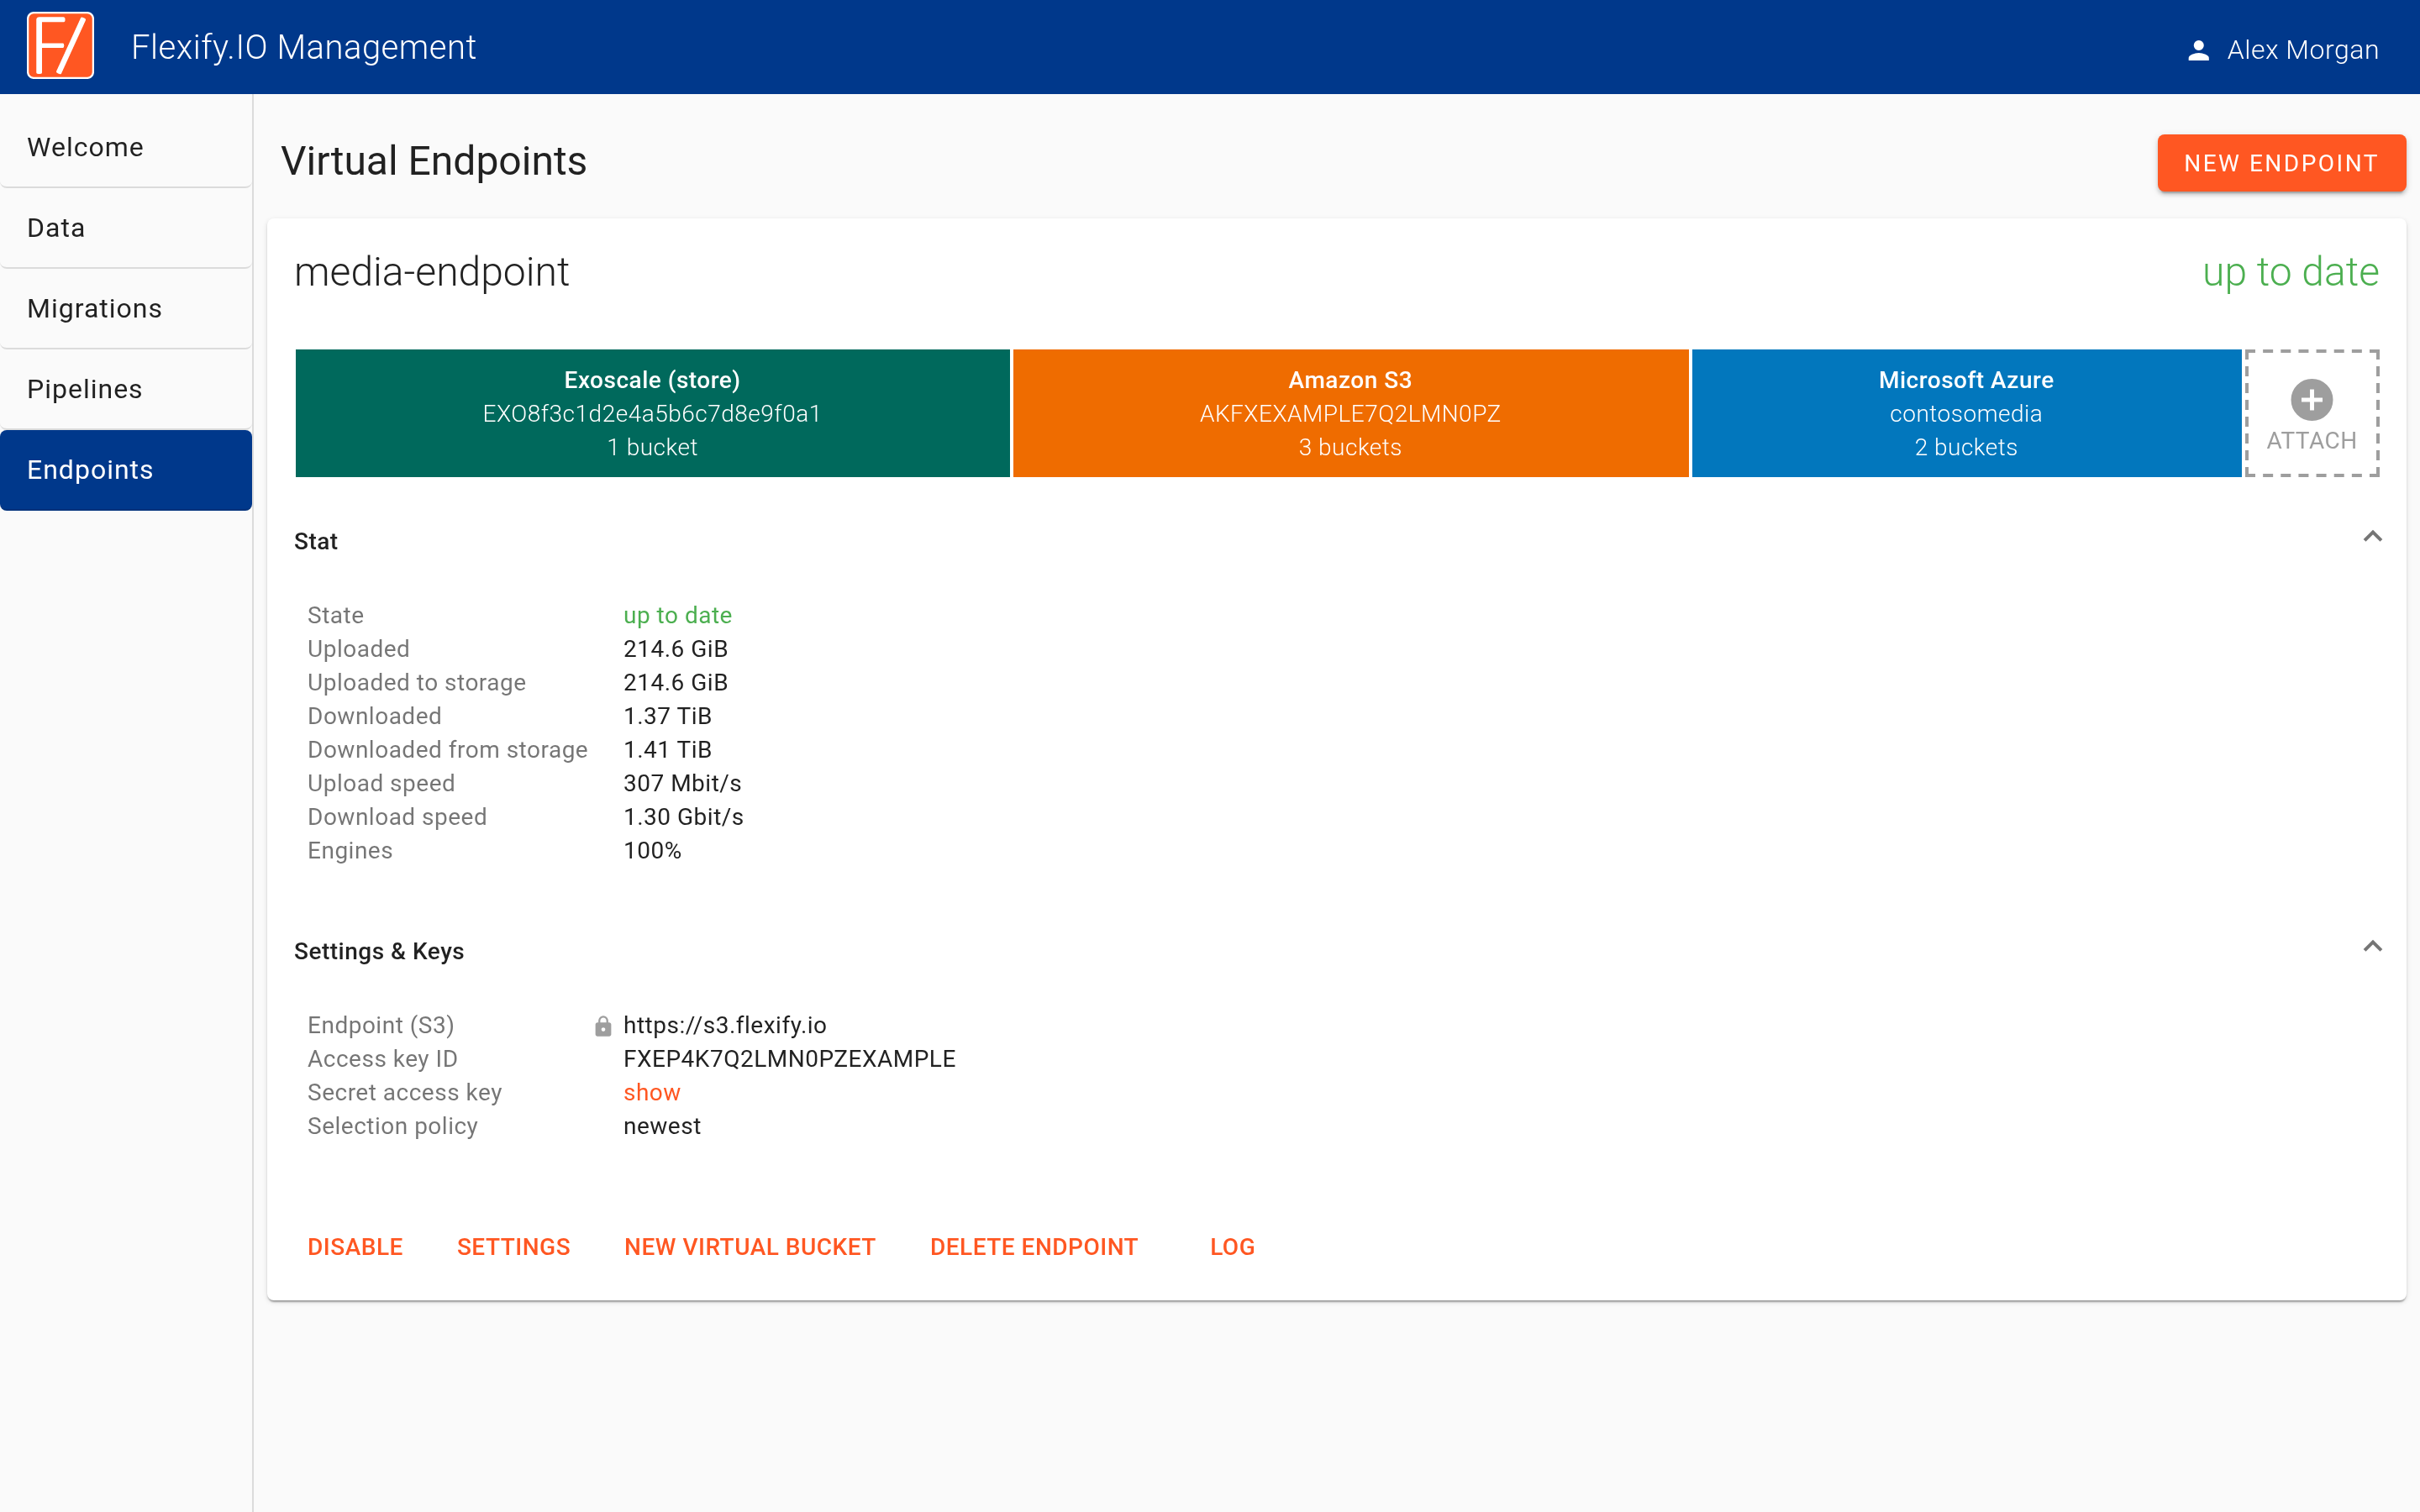
If a storage isn't S3-compatible, such as Microsoft Azure Blob Storage, Flexify.IO translates protocols transparently, so your application still works with plain S3.
Step 4. Choose where new data goes
Flexify.IO writes new and updated objects to the storages where the Store data uploaded via Virtual Endpoint here checkbox is set. The storage bar marks such storage providers as “(store)”.
To change where new data goes:
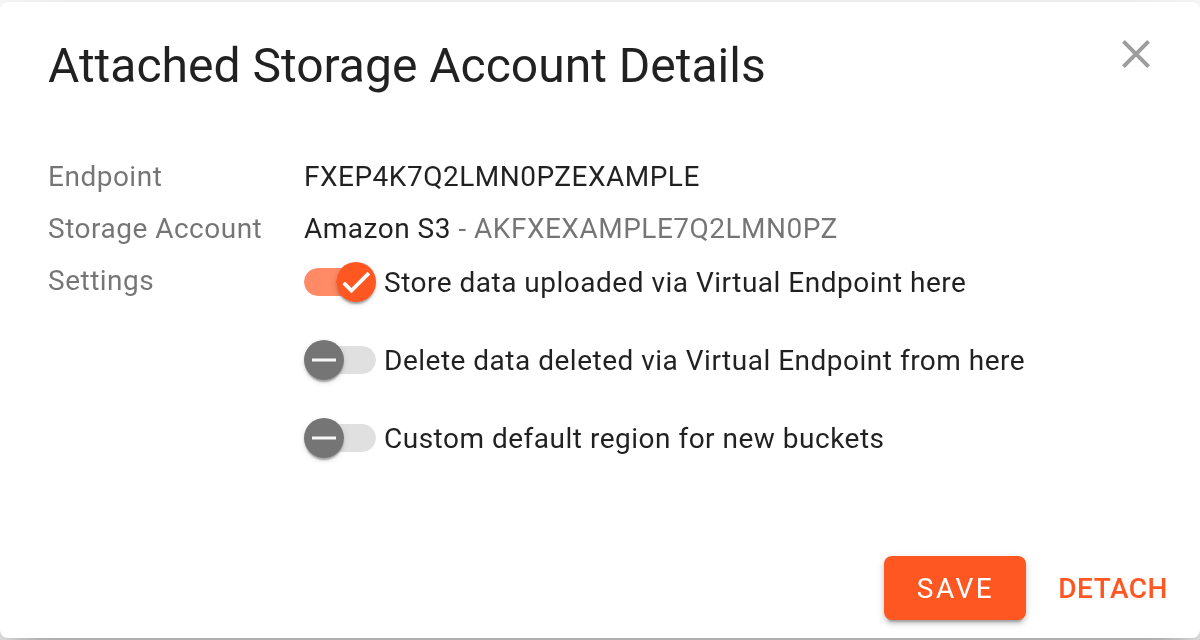
Click the storage in the endpoint's storage bar to open Attached Storage Account Details.
Turn on Store data uploaded via Virtual Endpoint here.
Click Save.
Turn the same toggle off on the storage that should no longer receive new data.
The Selection policy in the endpoint's Settings decides which copy is read when an object exists in several storages: Newest, Fastest, or Priority (the order of the storage bar; drag storages to reorder them).
Step 5. Move existing data (optional)
Changing where new data goes gradually shifts your data to that storage, because new and updated objects land there. To move existing data faster, start an explicit migration:
Click Transfer Data on the Data page.
Select the From and To buckets.
Click Start Migration.
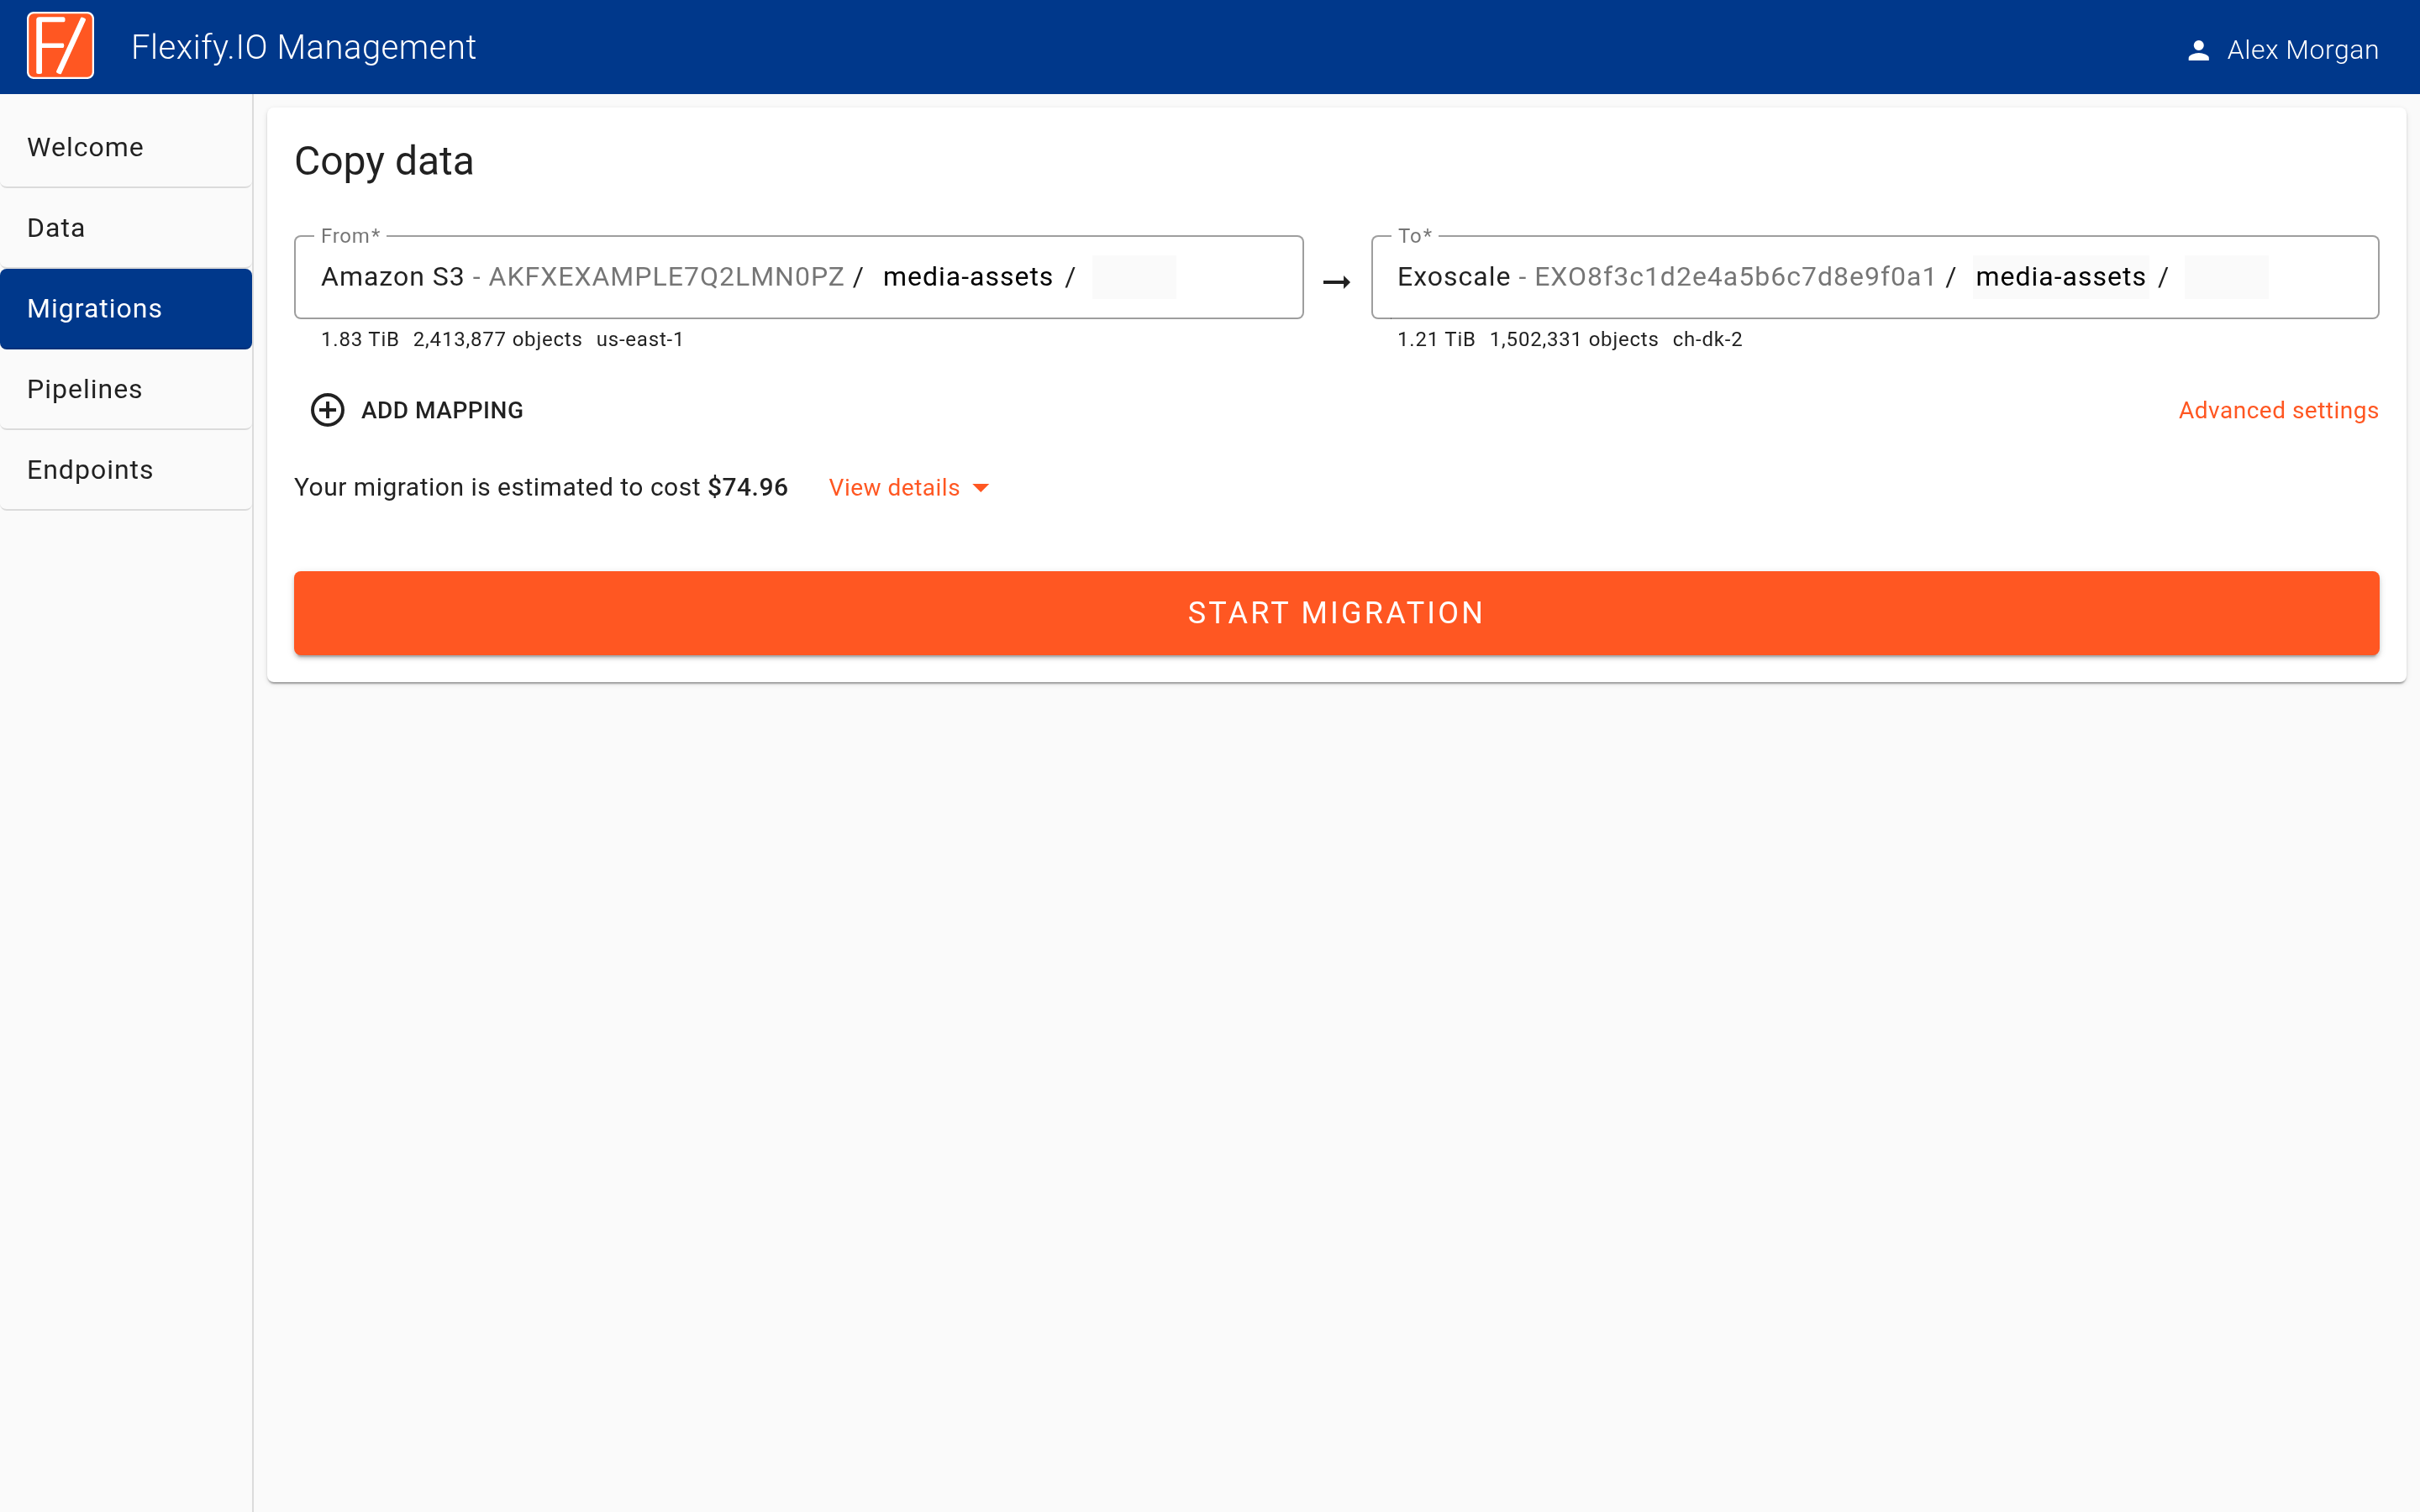
Your application keeps seeing all objects while they move. See How to migrate data between clouds for details.