How to migrate data from Amazon S3 to Exoscale
Exoscale offers numerous advantages over AWS, including Switzerland-based headquarters and data centers in a former military complex in Vienna or underground the Alps near Zurich.
This guide explains how to use Flexify.IO to migrate data from Amazon S3 to Exoscale Object Storage, with no downtime for your application.
Overview
Moving compute workloads is usually a matter of configuring a few virtual machines. Moving data is harder:
Large volumes of data can take days or weeks to migrate, even over fast connections.
Users and applications keep changing data during the migration, so already-migrated data can go out of date.
Flexify.IO handles both: migration engines run in the cloud and copy data in parallel, and a virtual endpoint lets your application see source and destination as one bucket while the migration runs.
Prerequisites
A Flexify.IO account. Sign up at manage.flexify.io.
AWS access keys with read access to the source bucket. Create them in the IAM section of the AWS Console.
An Exoscale bucket and API keys. Create them in the Exoscale Portal.
Step 1. Add your Amazon S3 storage
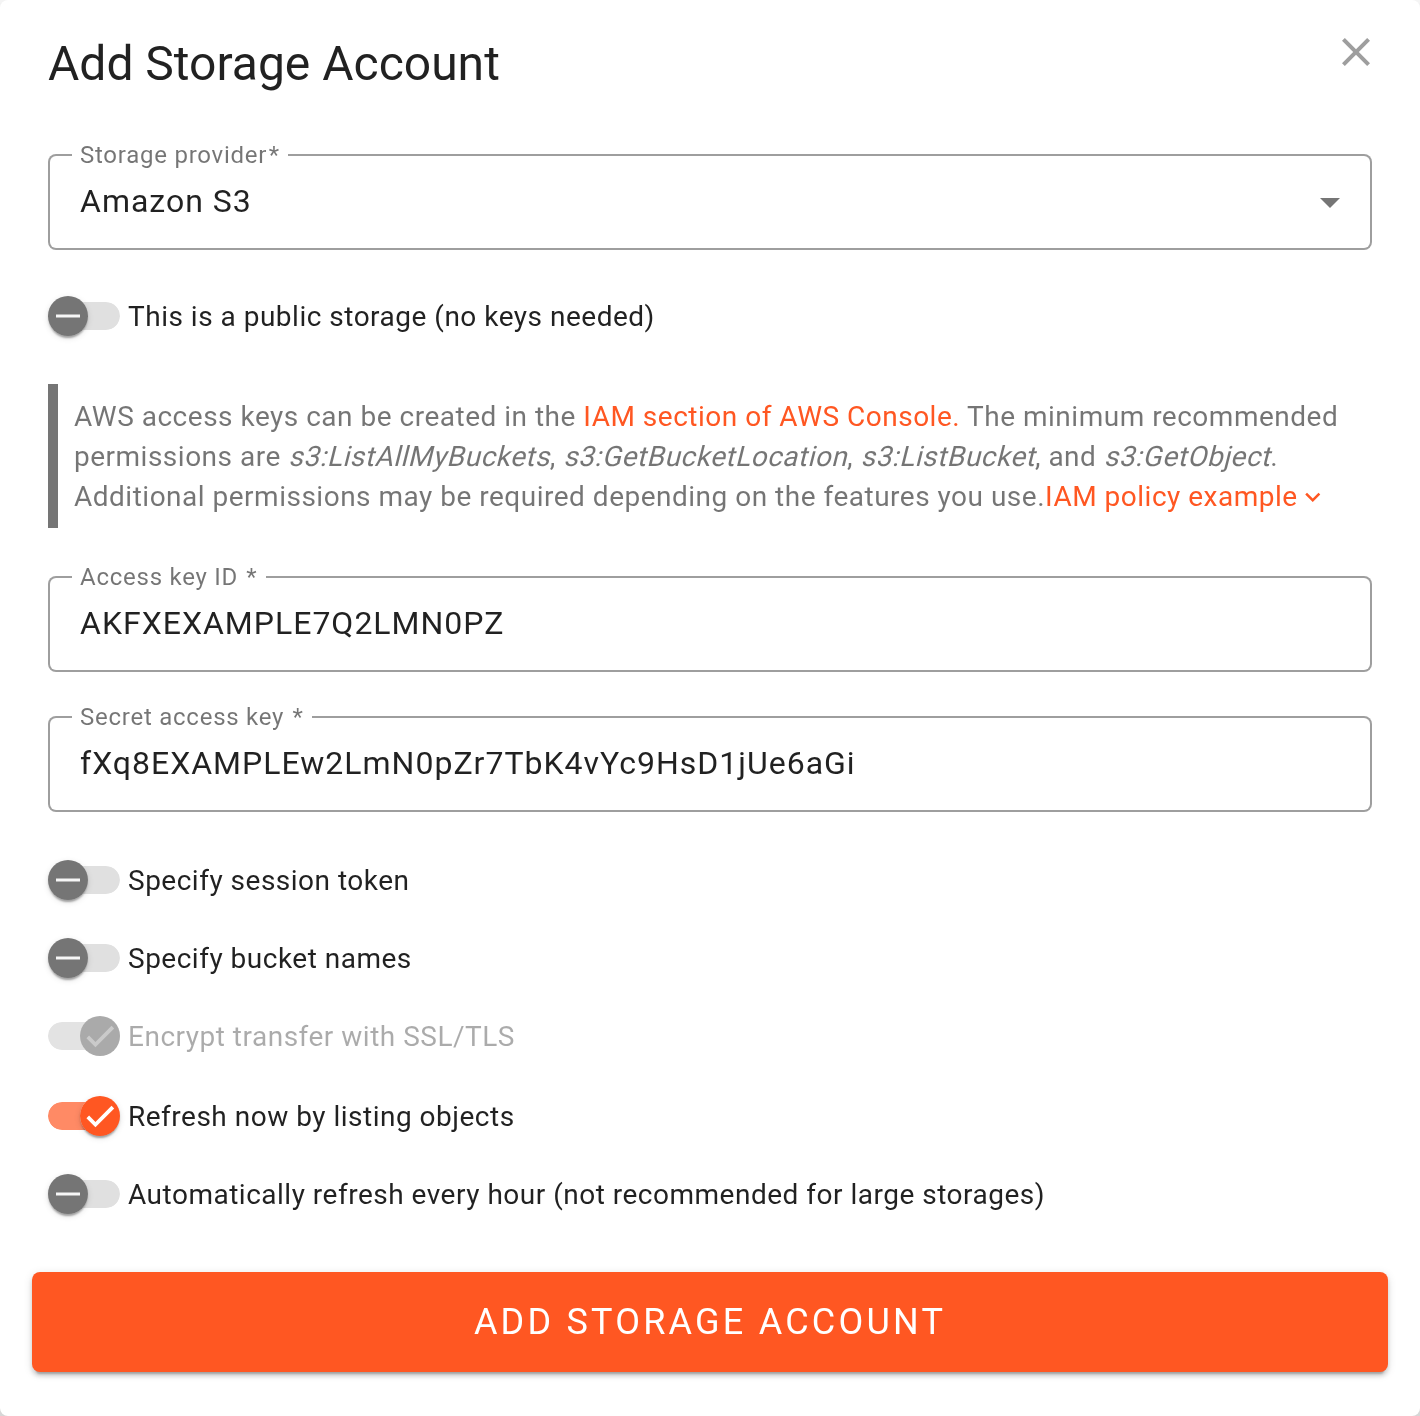
In Flexify.IO Management, open the Data tab and click Add Storage Account.
Select Amazon S3 as the Storage provider.
Enter your Access key ID and Secret access key.
Click Add Storage Account.
Step 2. Add your Exoscale storage
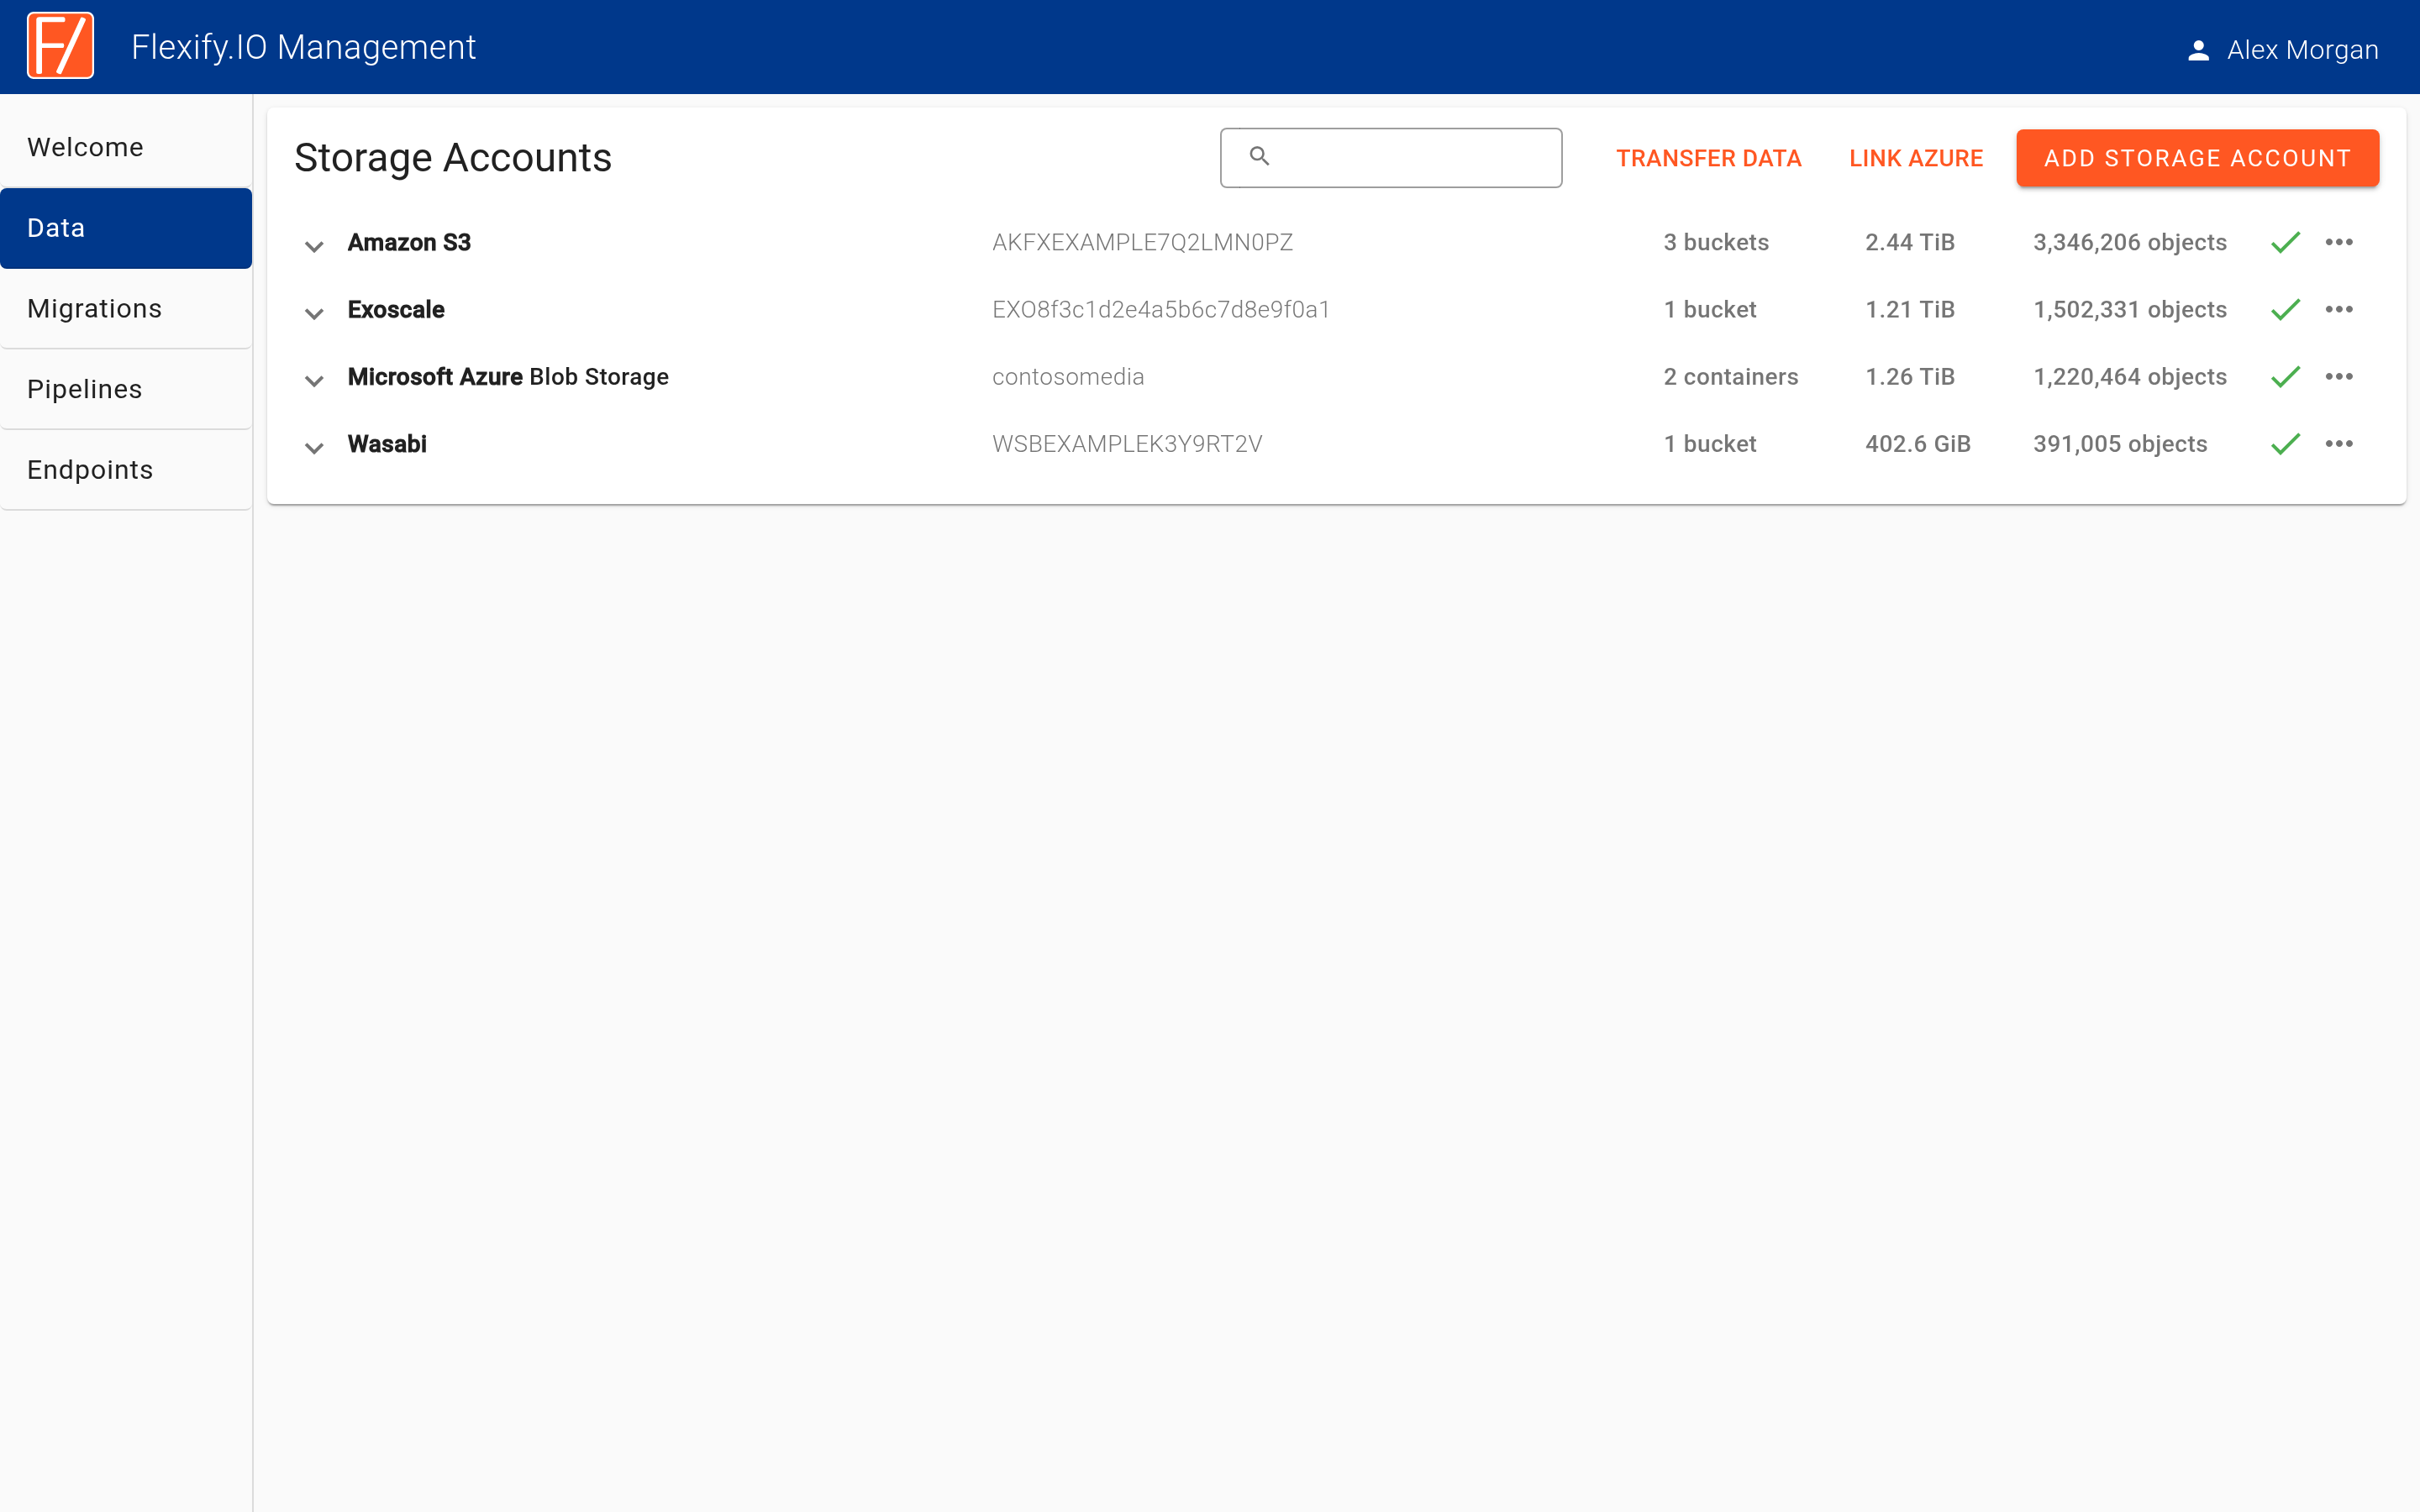
Repeat the steps above, but select Exoscale as the Storage provider and enter your Exoscale API key and secret.
Flexify.IO lists the buckets in each storage account and calculates their size and number of objects. You don't need to wait for this to finish before you start the migration.
Step 3. Route your application through Flexify.IO (optional)
While the migration runs, a Flexify.IO virtual endpoint can combine all objects, migrated and not yet migrated, as a single bucket.

Open Endpoints and click New Endpoint.
Click Attach and attach your Amazon S3 storage account with Store data uploaded via Virtual Endpoint here turned off.
Click Attach again and attach your Exoscale storage account with Store data uploaded via Virtual Endpoint here turned on.
Configure your application to use the endpoint from Settings & Keys (for example
s3.flexify.ioinstead ofs3.amazonaws.com) together with the endpoint's Access key ID and Secret access key.
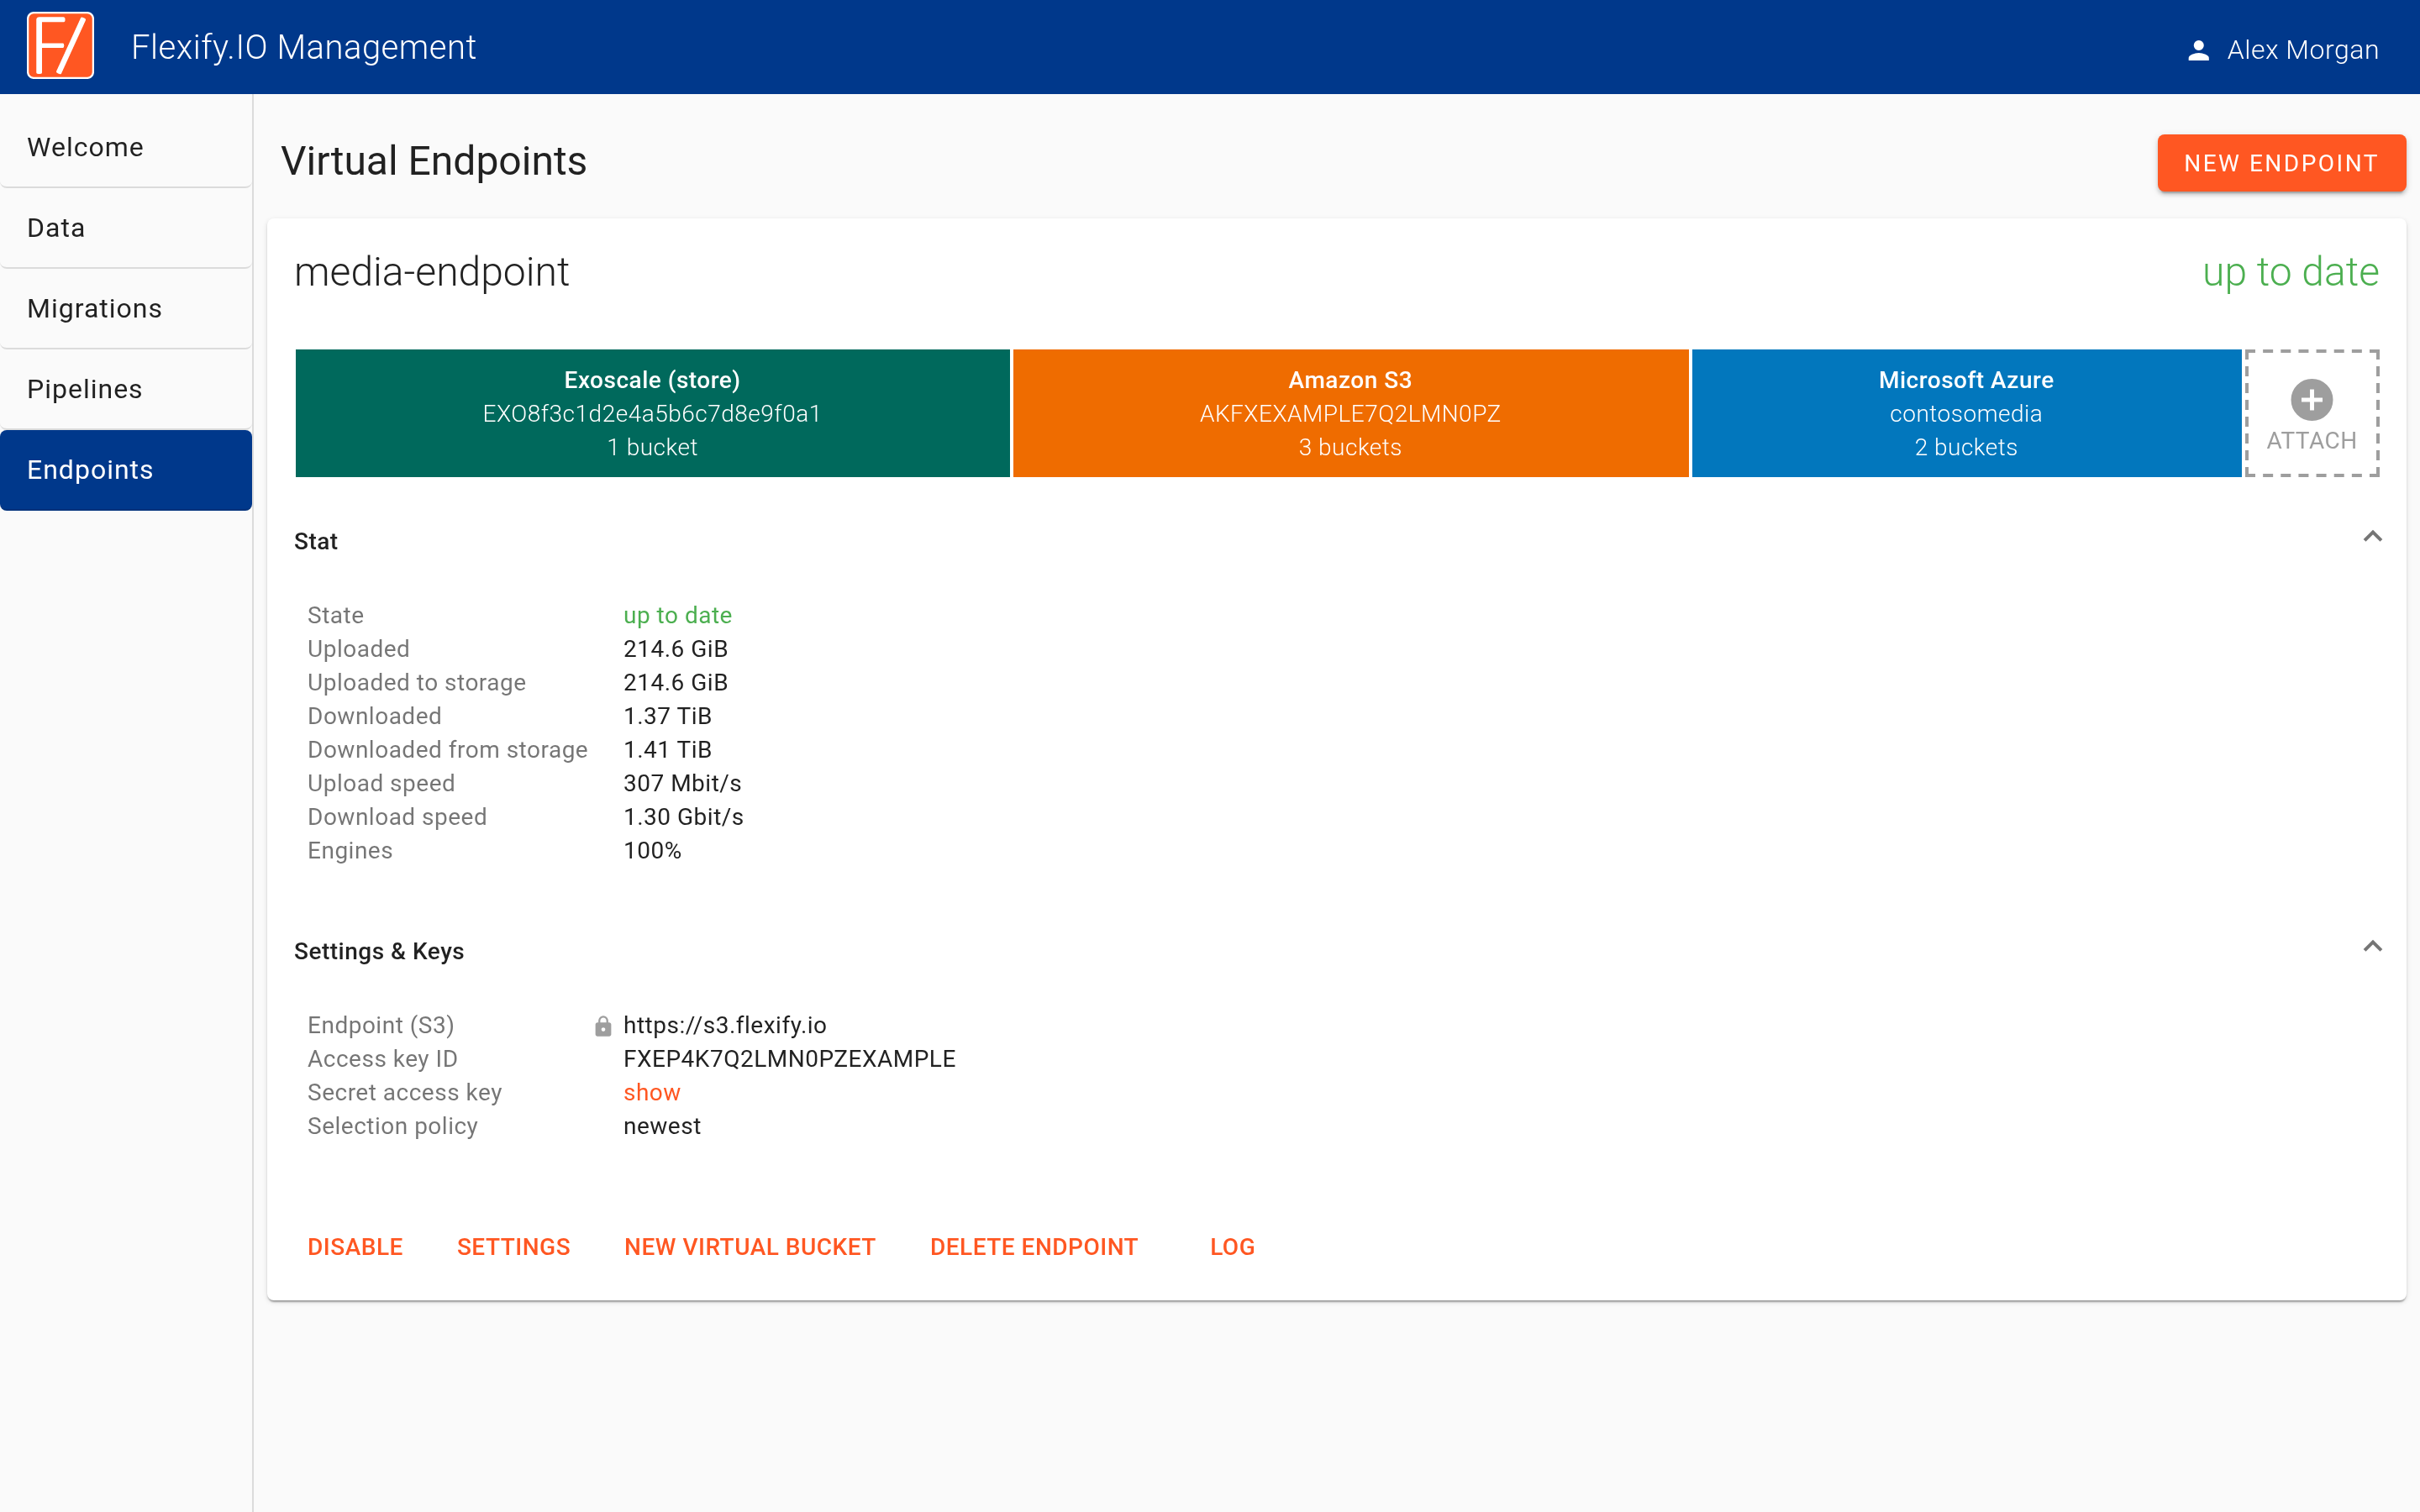
Flexify.IO doesn't store any data. It combines the attached storages into one virtual S3-compatible storage:
GET requests are served from the storage that holds the object, AWS or Exoscale.
PUT requests go to the storage marked (store), which is Exoscale.
LIST requests go to both storages, and the results are merged into a single list.
Step 4. Start the migration
Click Transfer Data on the Data page, or New Migration on the Migrations page.
In From, select your Amazon S3 storage account and bucket.
In To, select your Exoscale storage account and bucket.
Click Start Migration.
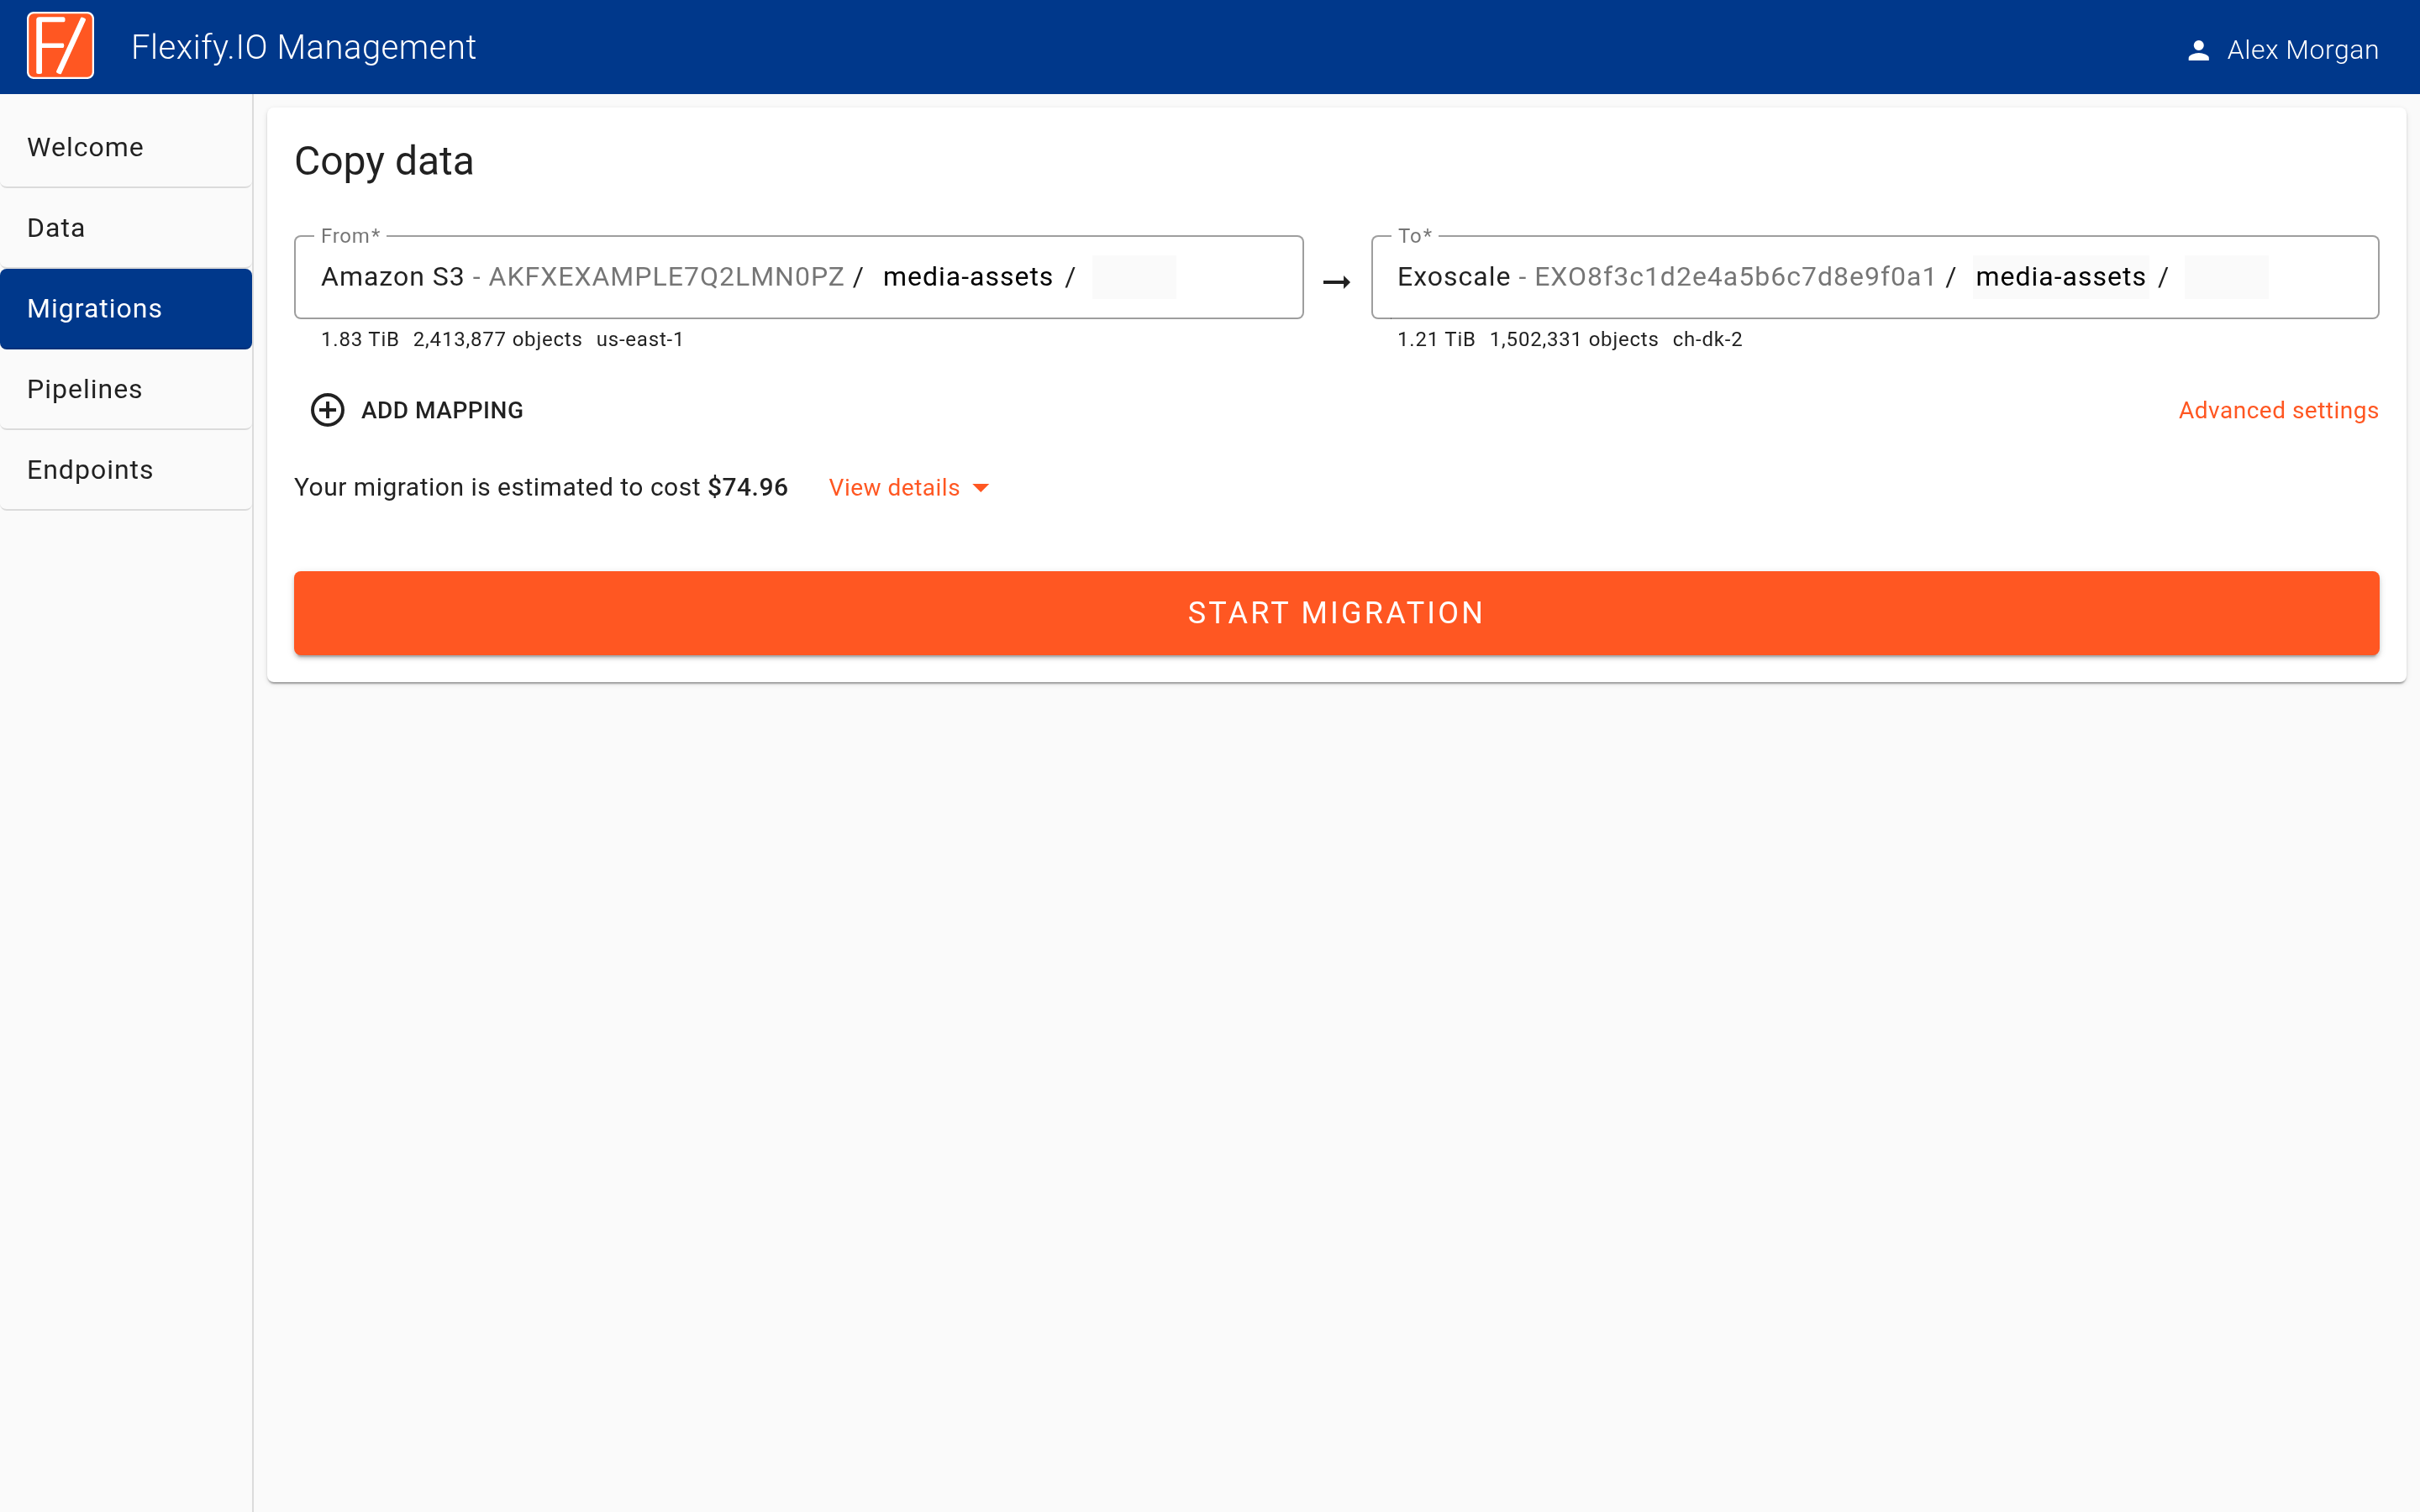
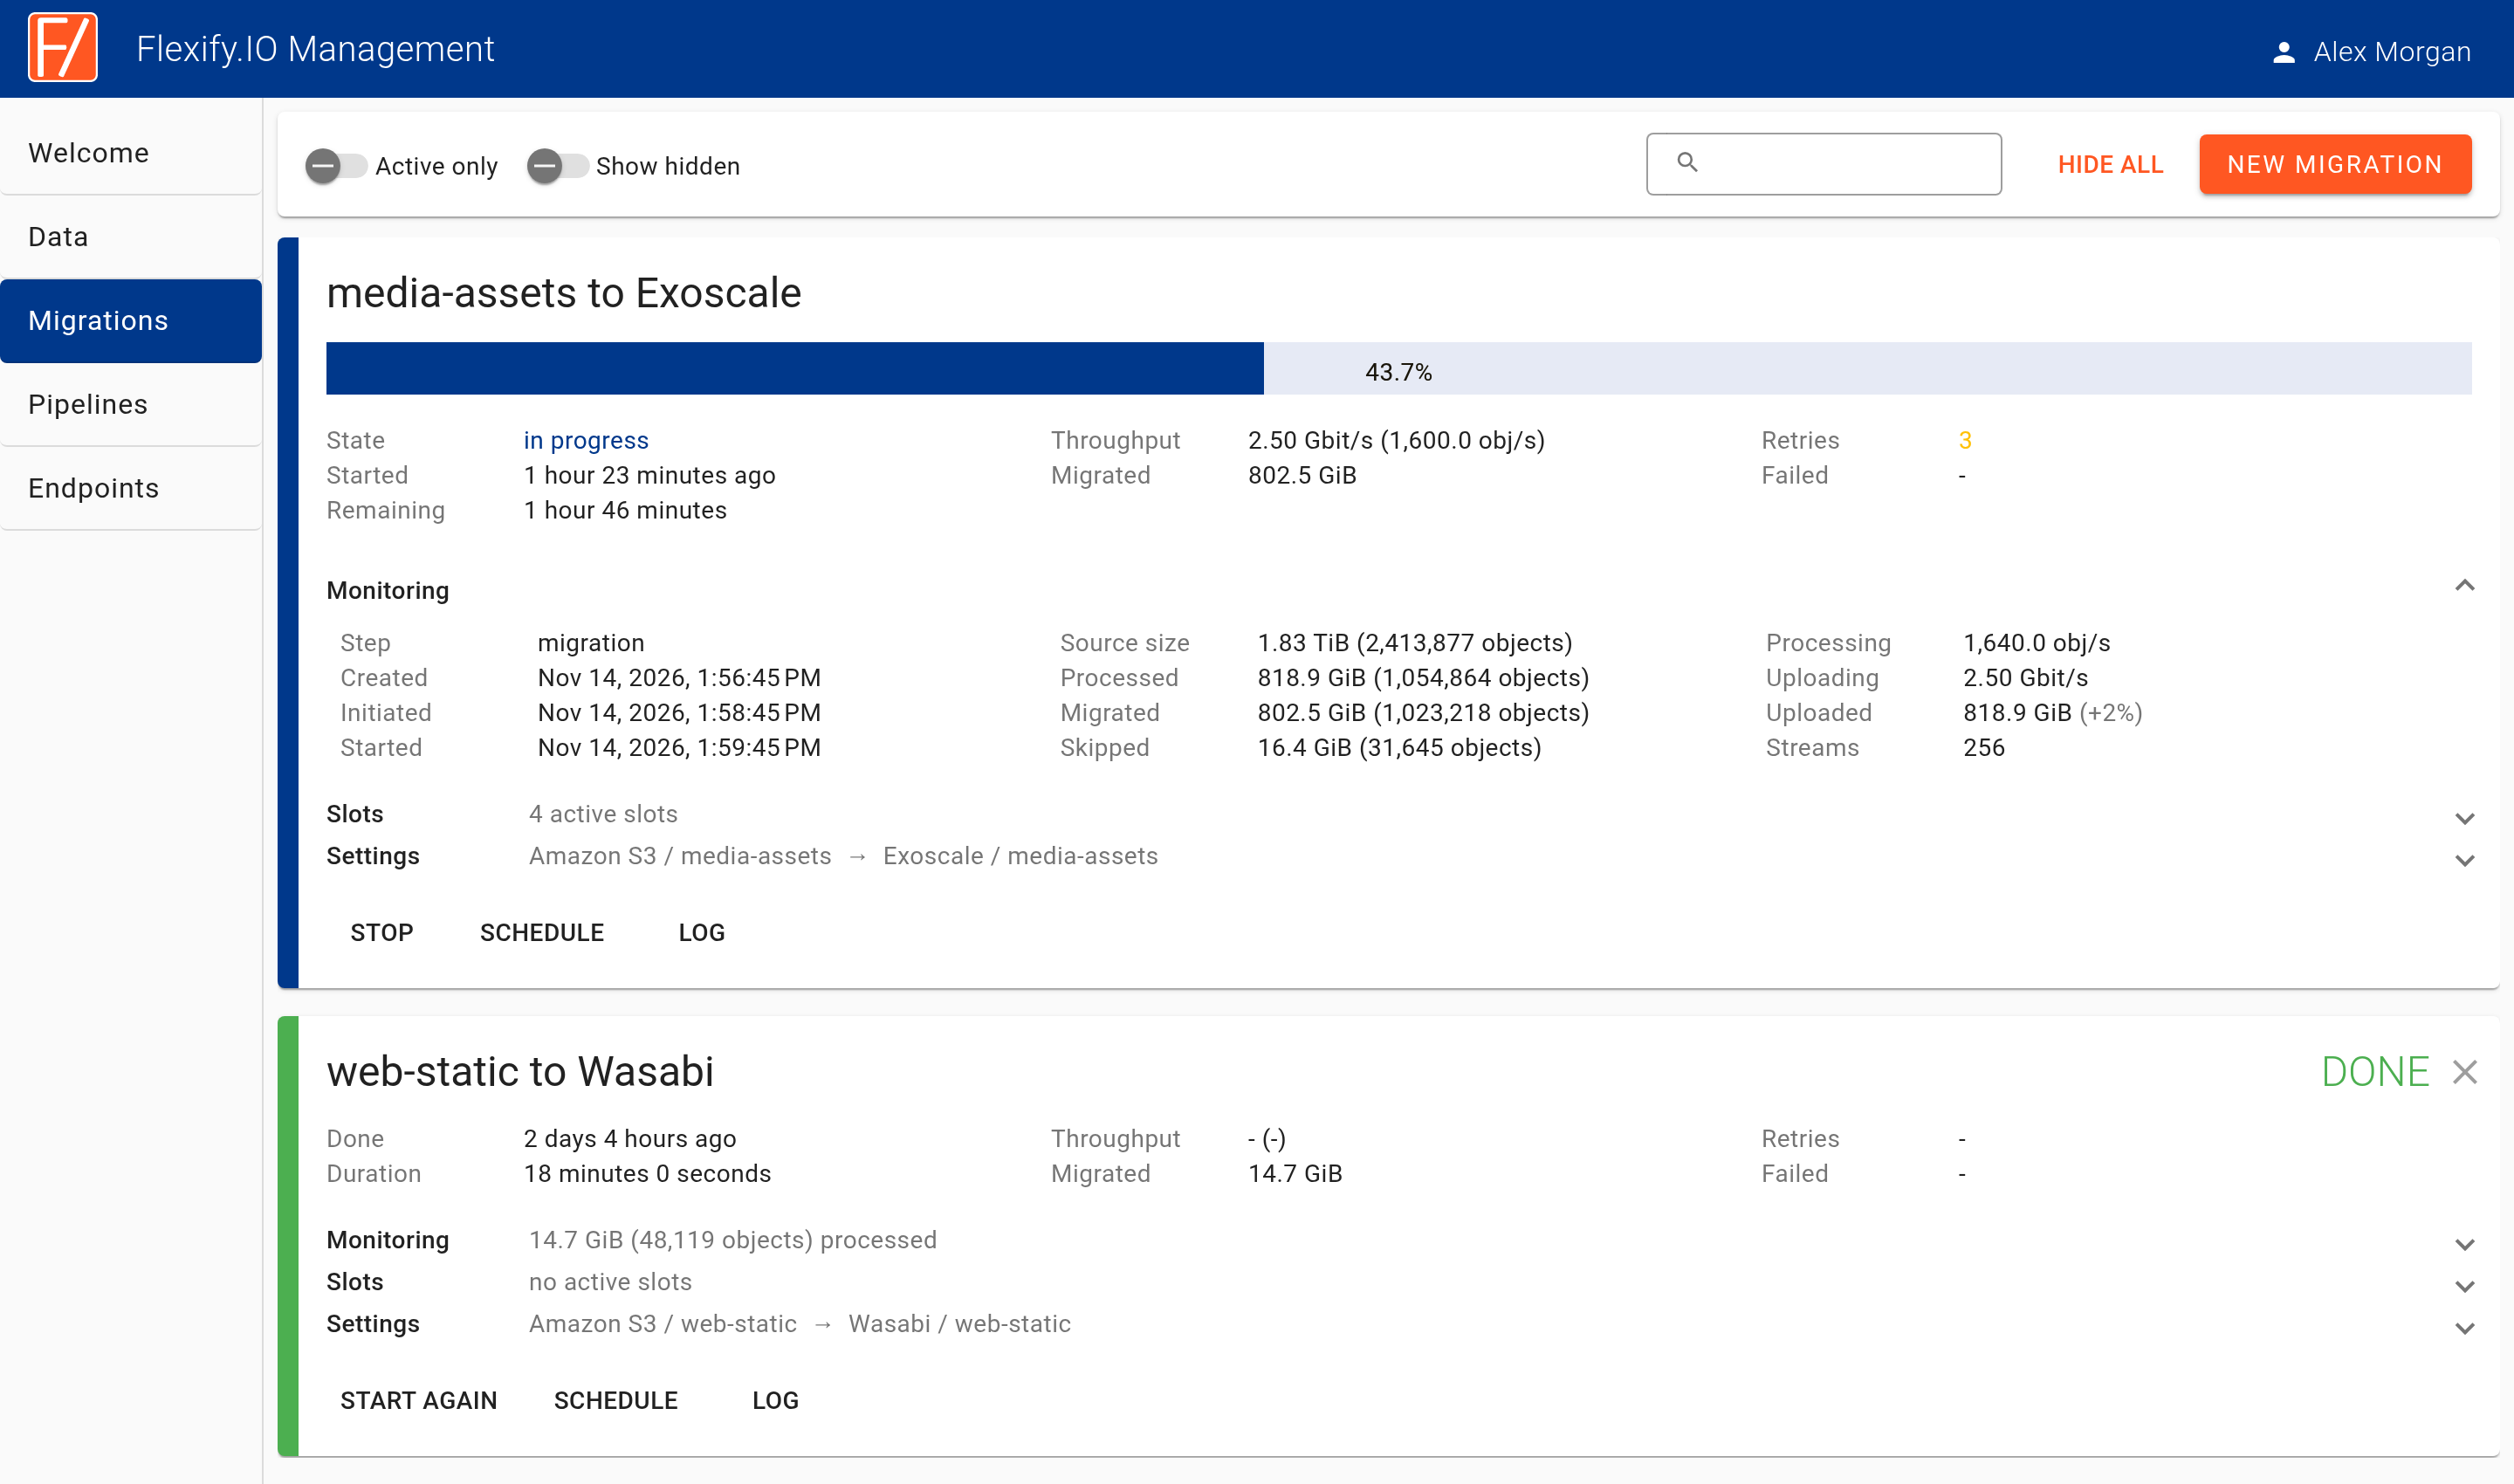
Monitor the progress on the Migrations page.
Step 5. Finish
When the migration is complete, you can switch your application directly to the Exoscale endpoint for your zone (for example sos-ch-dk-2.exo.io) and Exoscale keys. You can also keep using the Flexify.IO endpoint and detach the Amazon S3 storage from it.
We are here to help
Migrating large amounts of data between clouds takes careful planning. If you plan to migrate more than 10 TB, contact us. We can help you plan the migration, offer special pricing, and prepare our infrastructure for maximum throughput and no-egress path from the source cloud provider.