Adding Azure Blob storage account
When adding an Azure Blob storage account, there are several ways to authenticate Flexify.IO:
Azure storage account key
SAS (Shared Access Signature) token for entire storage account or individual container
Azure RBAC with Entra ID user impersonation
Azure RBAC with service principal
Using Azure storage account key
Using account-wide key for Azure storage account is the easiest way to add Azure Blob storage to Flexify.IO. The drawback is that this key gives unrestricted access to the entire Azure storage account and is not time-limited.
Locate Azure storage account in Azure Portal
In the left panel, locate Access Key
Copy-paste Storage account name and Key to Flexify.IO
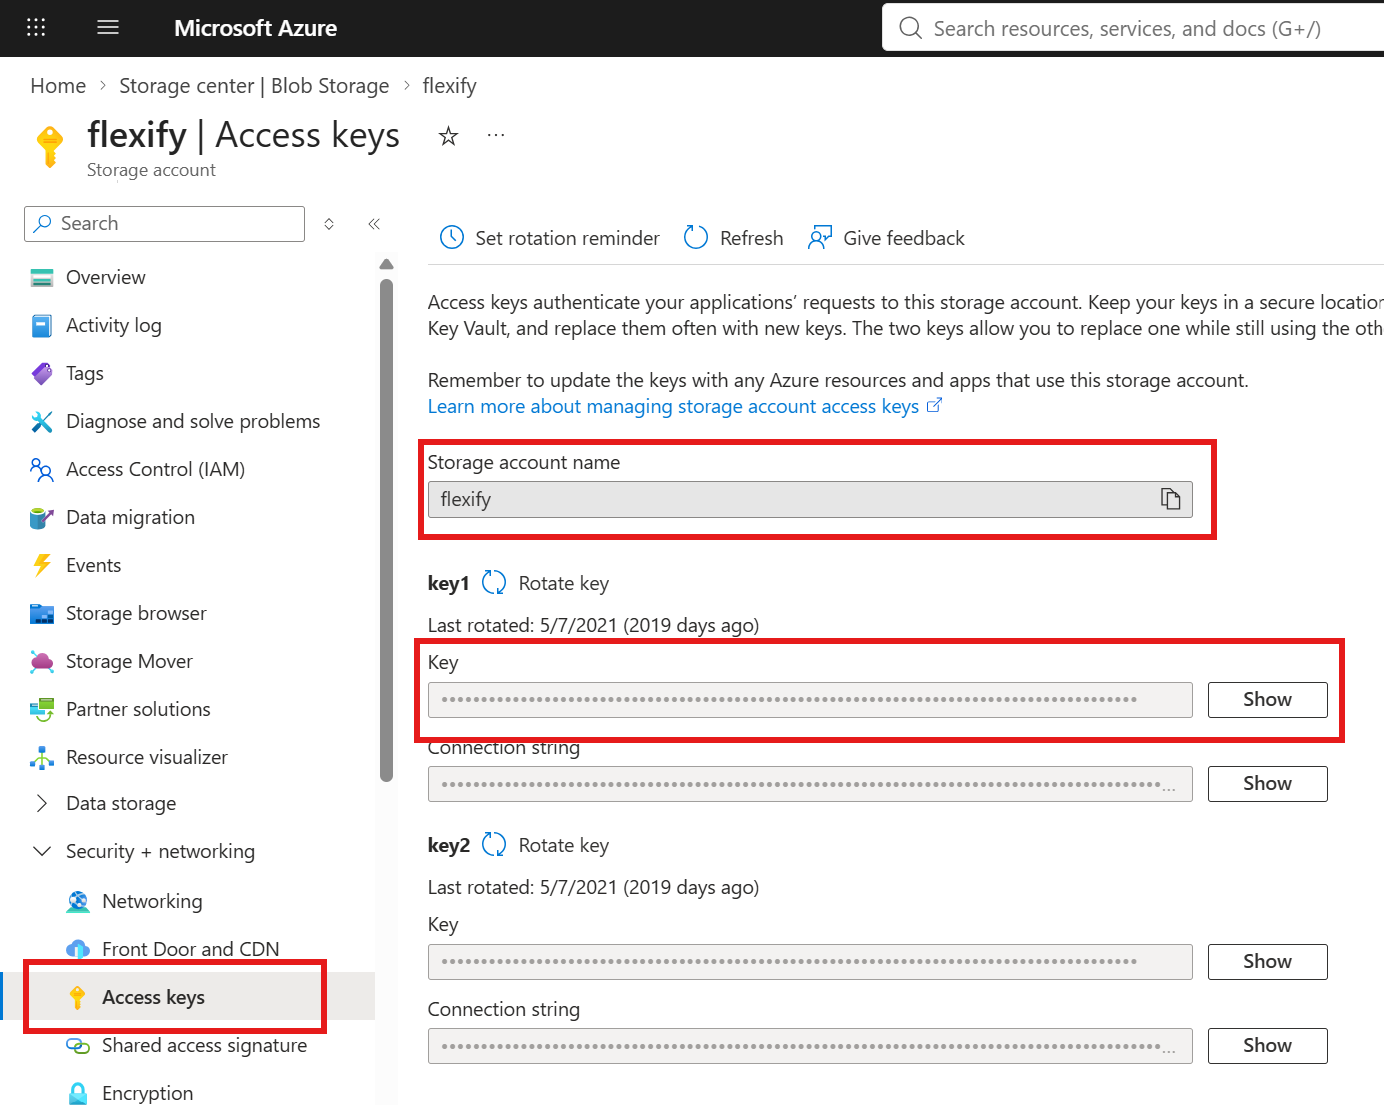
Be careful not to paste the Connecting string instead.
Using account SAS token
Locate your Azure storage account in Azure Portal
In the left panel, choose Settings → Shared access sigature
Configure SAS by setting:
Allowed services: Blob
Allowed resource types: Service, Container, and Object
Allowed permission: leave all selected to change to Read and List for read-only access
Uncheck Blob index permissions
Specify Expiry date/time
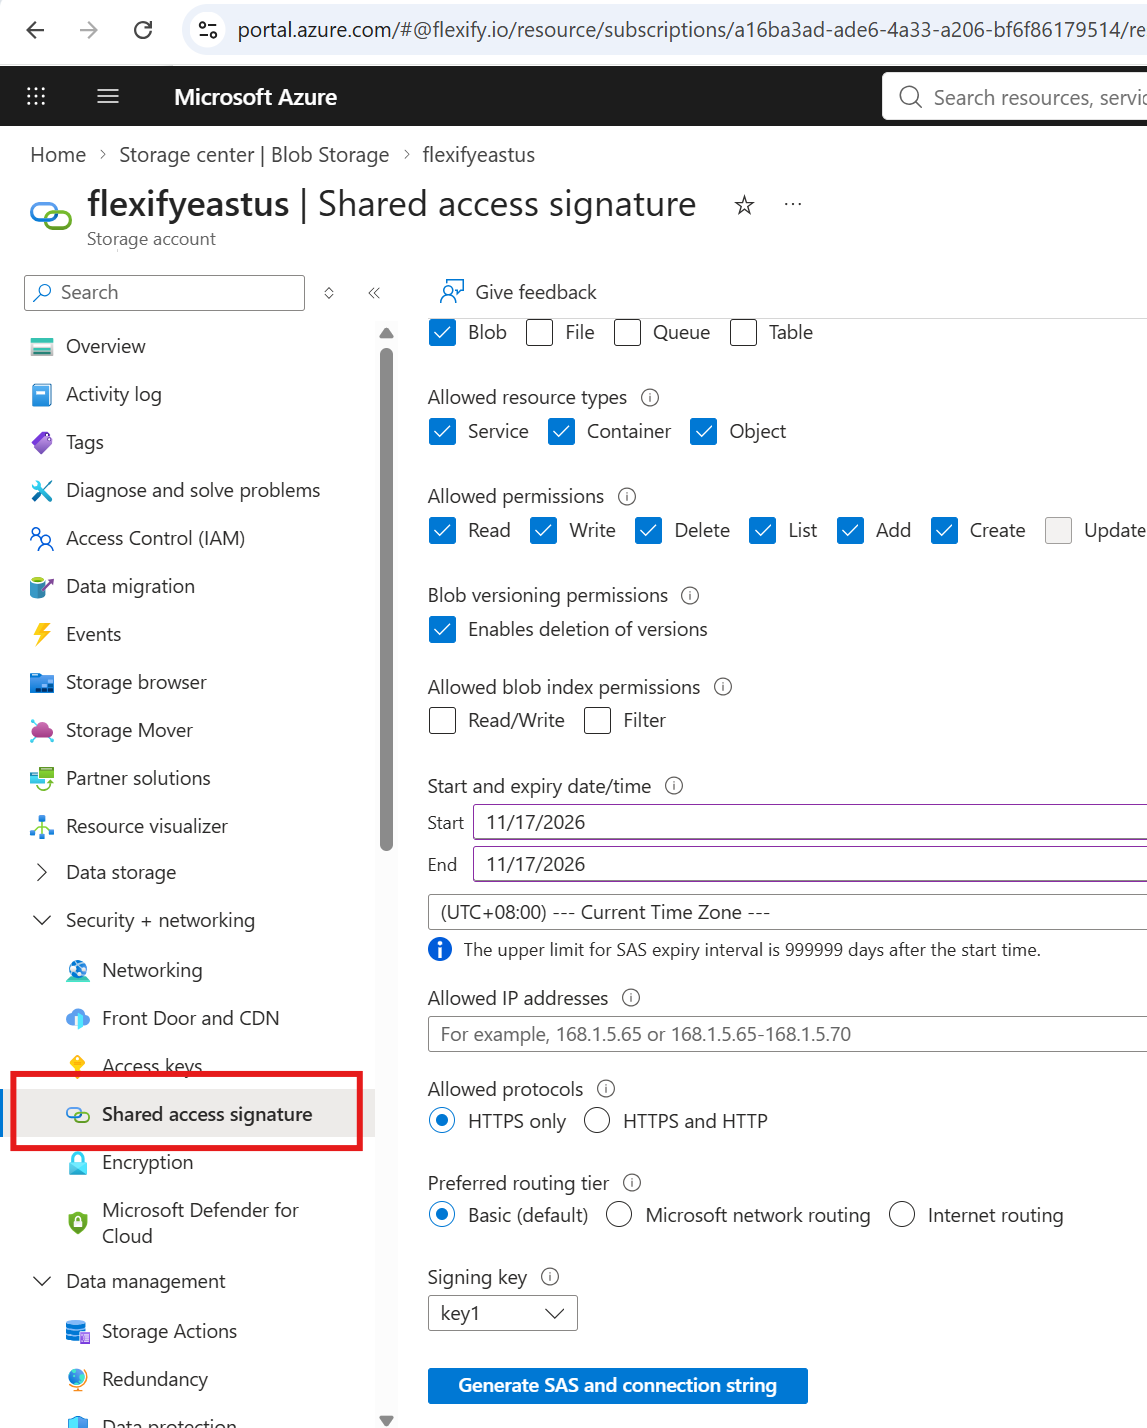
Click Generate SAS and connection string
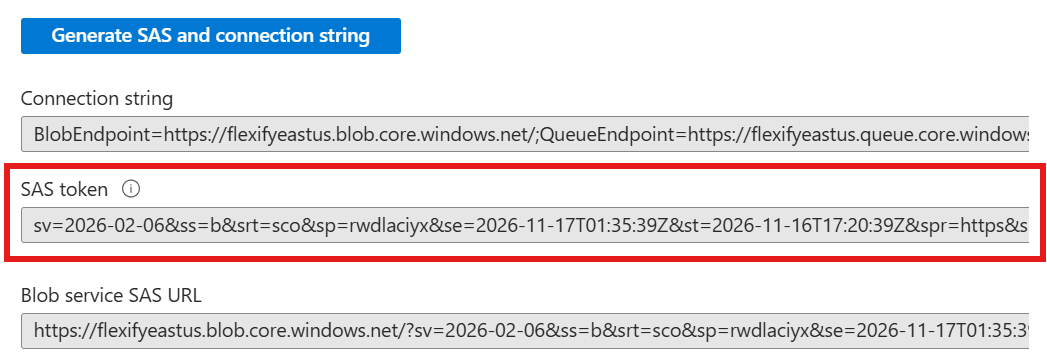
Copy SAS token. Be careful not to copy Connection string or Blob service SAS URL instead.
Now you can copy-paste the Azure storage account name and SAS token to Flexify.IO.
Using container SAS token
Locate your Azure storage account in Azure Portal
Choose Data Storage → Containers
Click on the container name
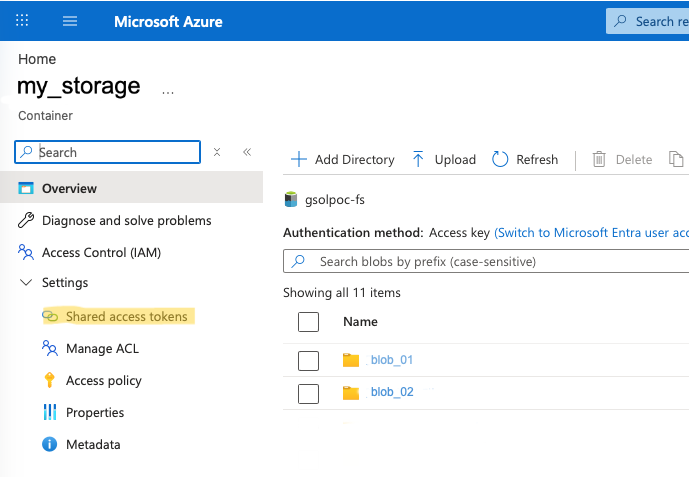
In the left panel chose Settings → Shared access tokens to reveal this page
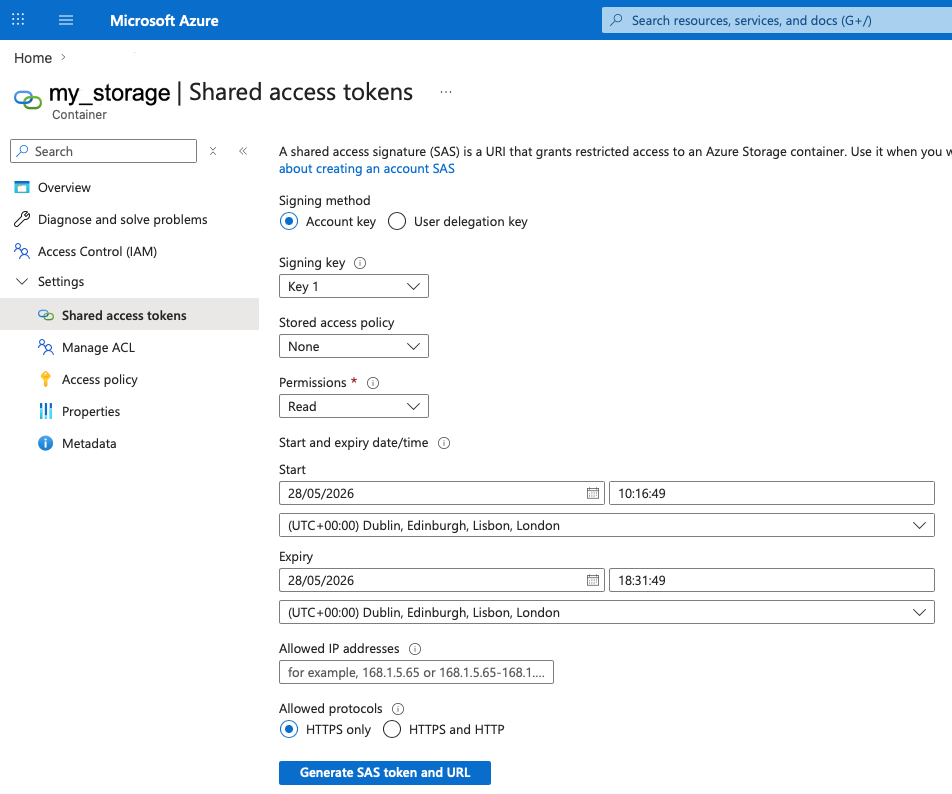
You should configure Permissions using the pull-down - the default is only Read but you can add Add, Create and Write for storage accounts you wish to be the destination for a migration.
Note that the the token exires 8 hours by default - choose the duration you require by specifying the expiry date and time.
Finally, press Generate SAS token and URL to display them:
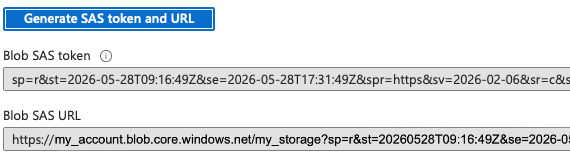
Copy-paste Azure storage account name and Blob SAS token to Flexify.IO. Be careful not to paste Blob SAS URL instead.
Check the Specify container names checkbox and copy-paste you Azure container name.
When using individual container SAS token, you are not giving Flexify.IO permissions to list your containers, hence you Flexify.IO requires explicitly specifying the container name.
Using RBAC
Flexify supports Entra ID User Impersonation and Entra ID Service Principal authentication. In either case the Azure storage account needs to gave one of these three roles assignments for the user or the principal you will be using:
Storage Blob Data Contributor
Storage Blob Data Owner
Storage Blob Data Reader
RBAC role assignment
Locate your Azure storage account in Azure Portal
Choose Access Control (IAM) on the left to reveal this page:
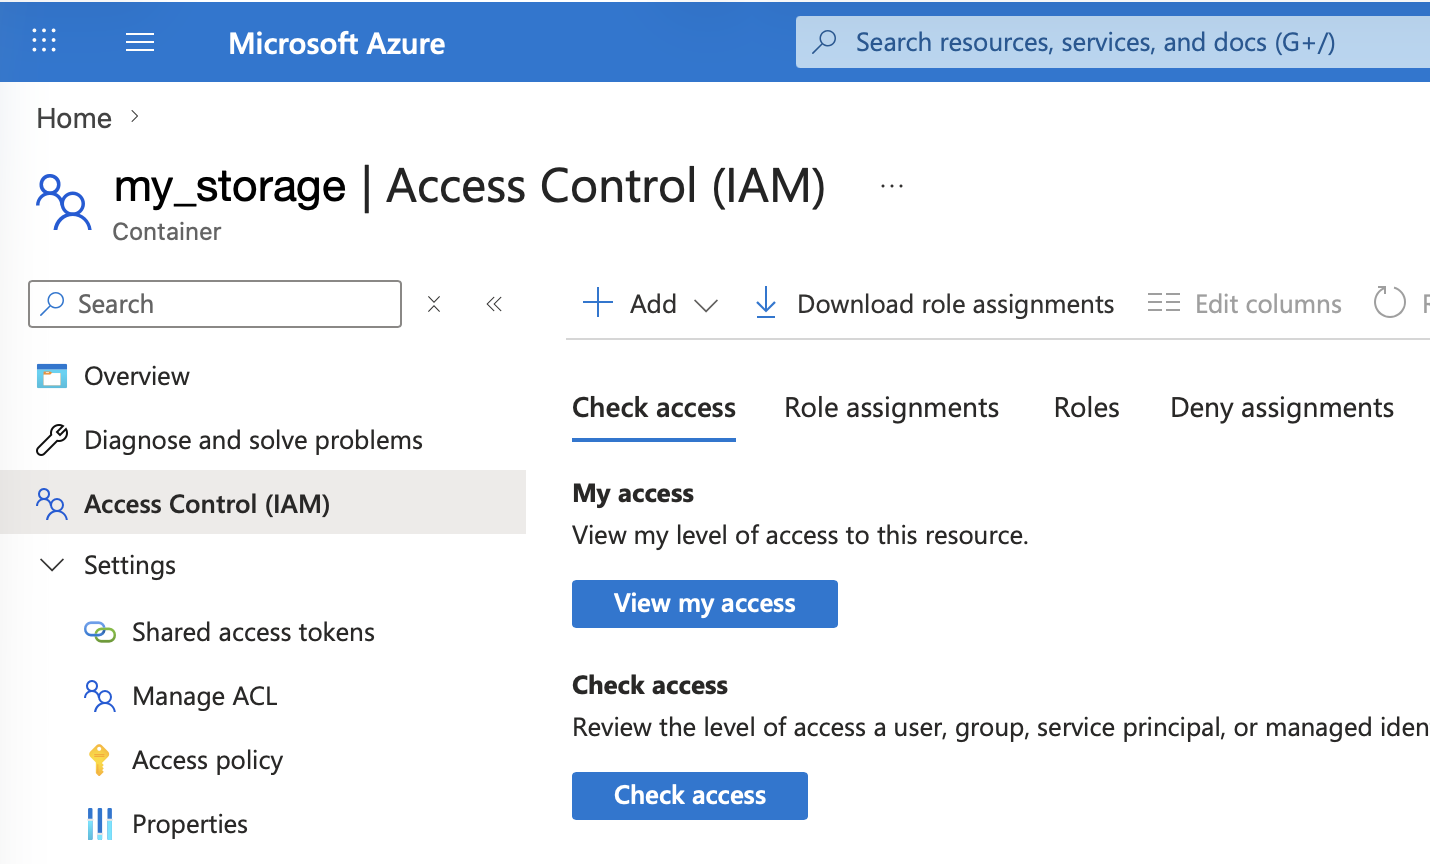
Click Add role assignment, then Members to reveal this page:
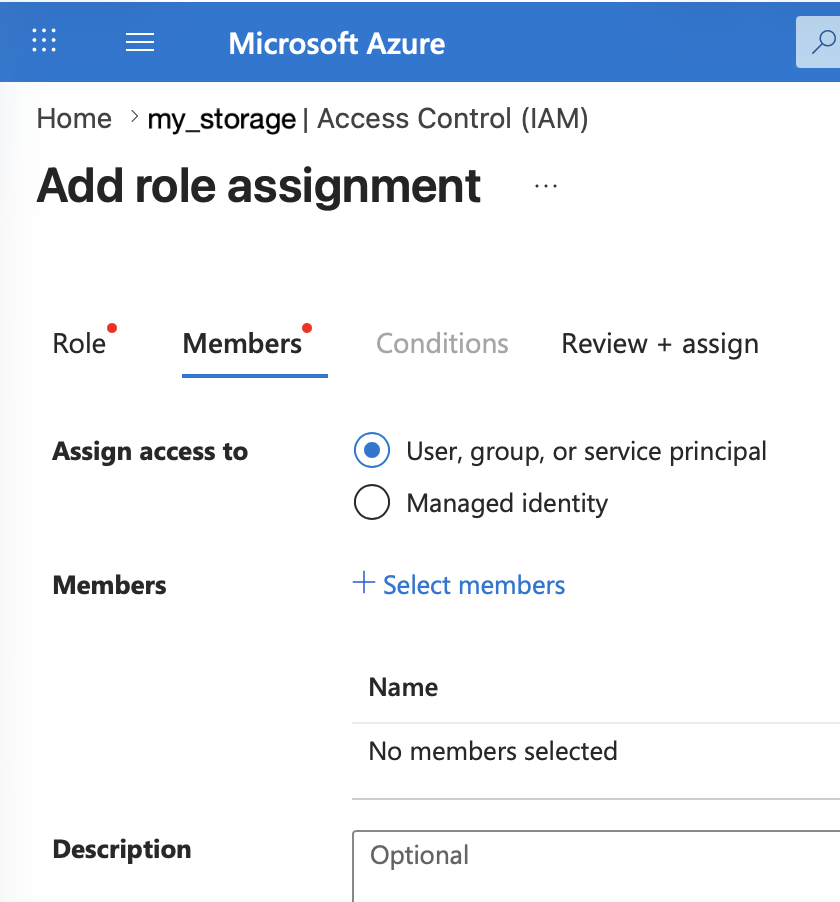
Press + Select members and choose the user whose account you wish to impersonate or a service principal you plan to use. Then press Select at the bottom of that panel.
The account name then appears instead of the No members selected text above.
Now choose the Role tab to show the Add role assignment page:
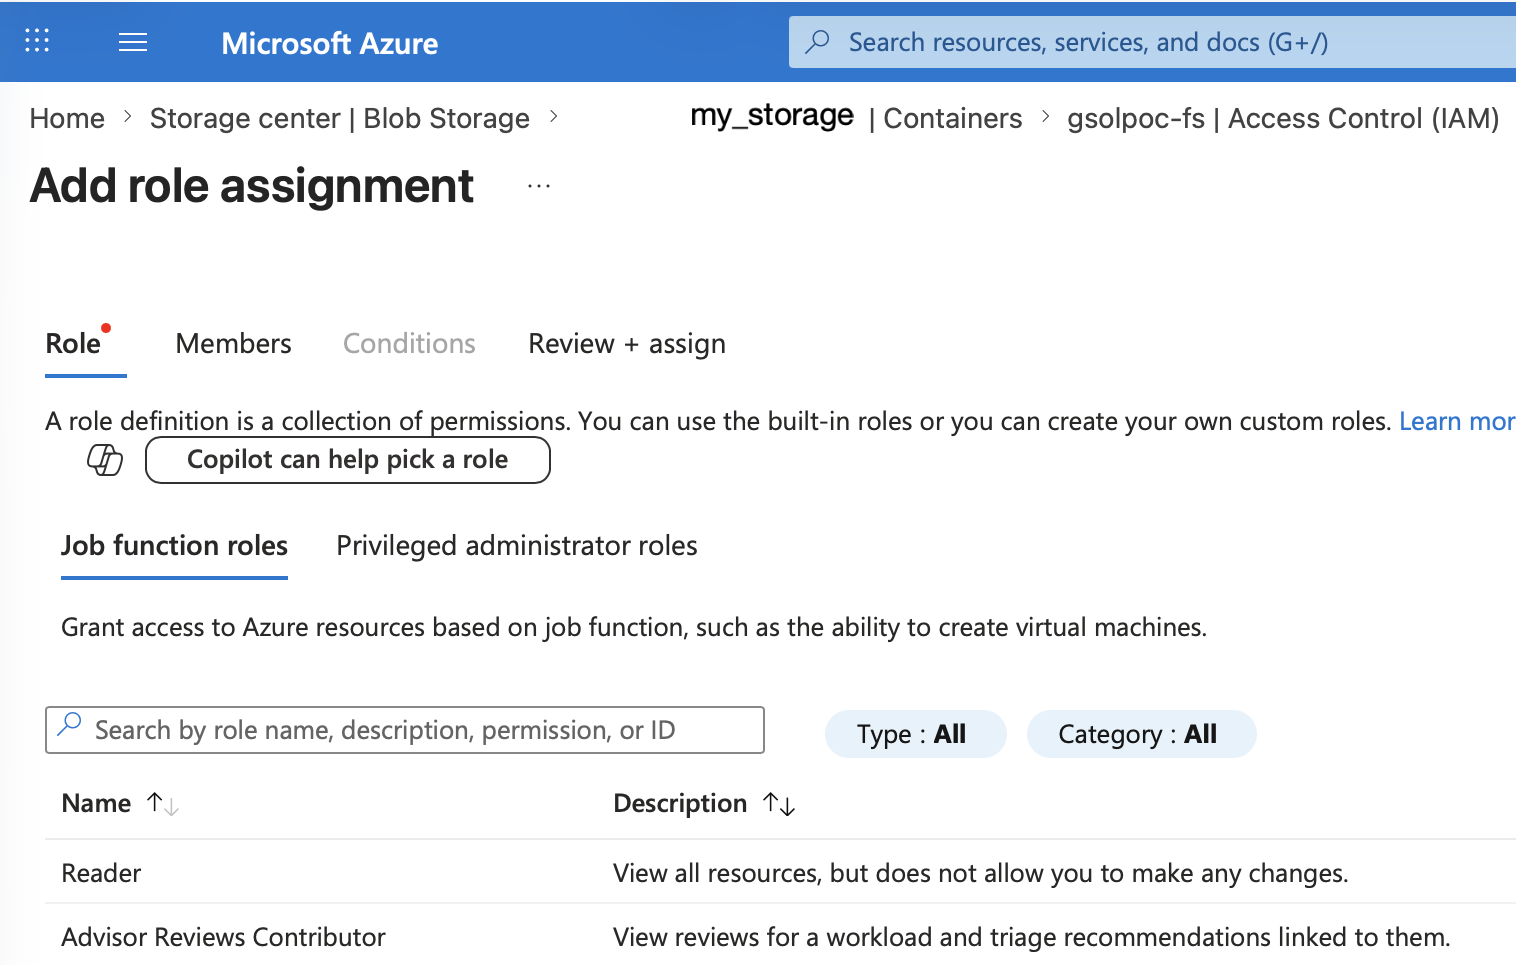
Type Storage Blob into the search box. Click once on the role you wish to add. Then click Review + assign at the bottom of the page.
The next screen shows the chosen role, and the Member name. Verify these are as you intended, then press Review + assign again.
The Azure account is now correctly configured for Flexify.IO to access the storage.